How to Send Meeting Invites in Outlook
These days, technology has come a long way in bringing people together, even at the workplace. Where once meetings are announced on office bulletin boards or in circulating memos, organizers can easily invite staff with just a few clicks of a button. Thanks to Microsoft Outlook, you can make sure that people know about your meeting and can adequately respond promptly. Here is a quick tip on how to send meeting invites in Outlook.
Introduction to Meeting Invites in Outlook
Especially in a big workplace or an organization that is spread out in different offices or simply having employees traveling for work, getting them all together for a meeting in one place can be taxing. This, however, can be changed with Outlook.
Outlook has a special feature, a meeting invite, that allows you to tell concerned individuals about your meeting, where and when it is going to be held, and even RSVP to the organizer. For others, accepting meetings or even asking for a reminder so you will not be late, is also easier with Outlook. In fact, the application can even remind you of the meeting up until it is just about to start.
This meeting invites feature makes the most of the application that we most often use in the workplace; the email. By allowing you to set, announce, and respond to meetings right in your Outlook app, you are able to work more seamlessly and can adapt to the necessary changes of the times.
Create Meeting Invitations in Outlook
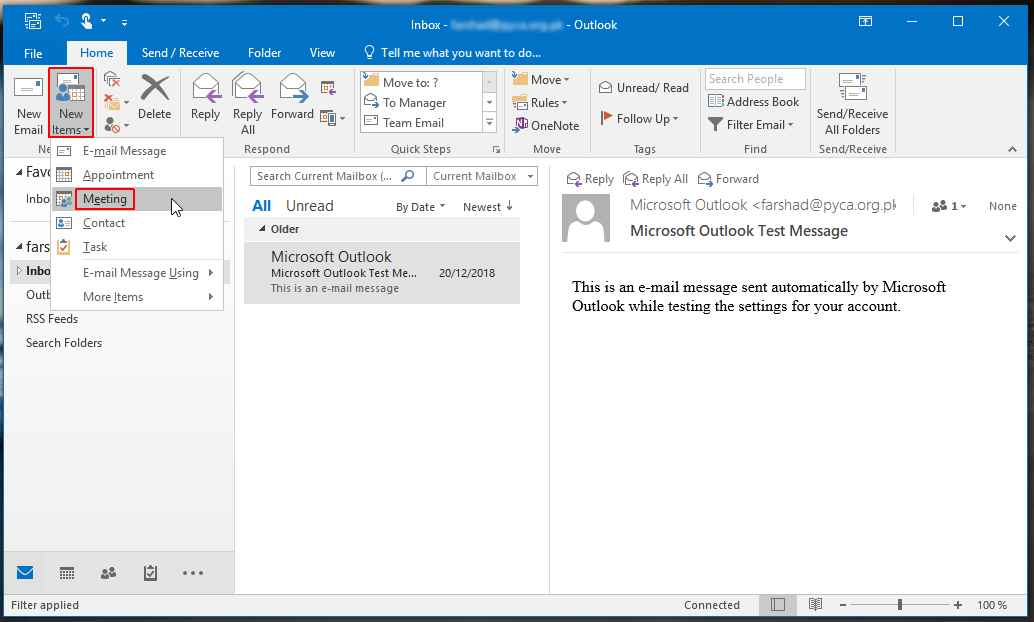
You can start creating meeting invitations anytime. Just open Outlook and click on the New Items drop-down arrow, located under the Home tab. From the drop-down menu, select Meeting. This Meeting function will allow you to create the invites you need for your organization. Once you click this option, a new window will open.
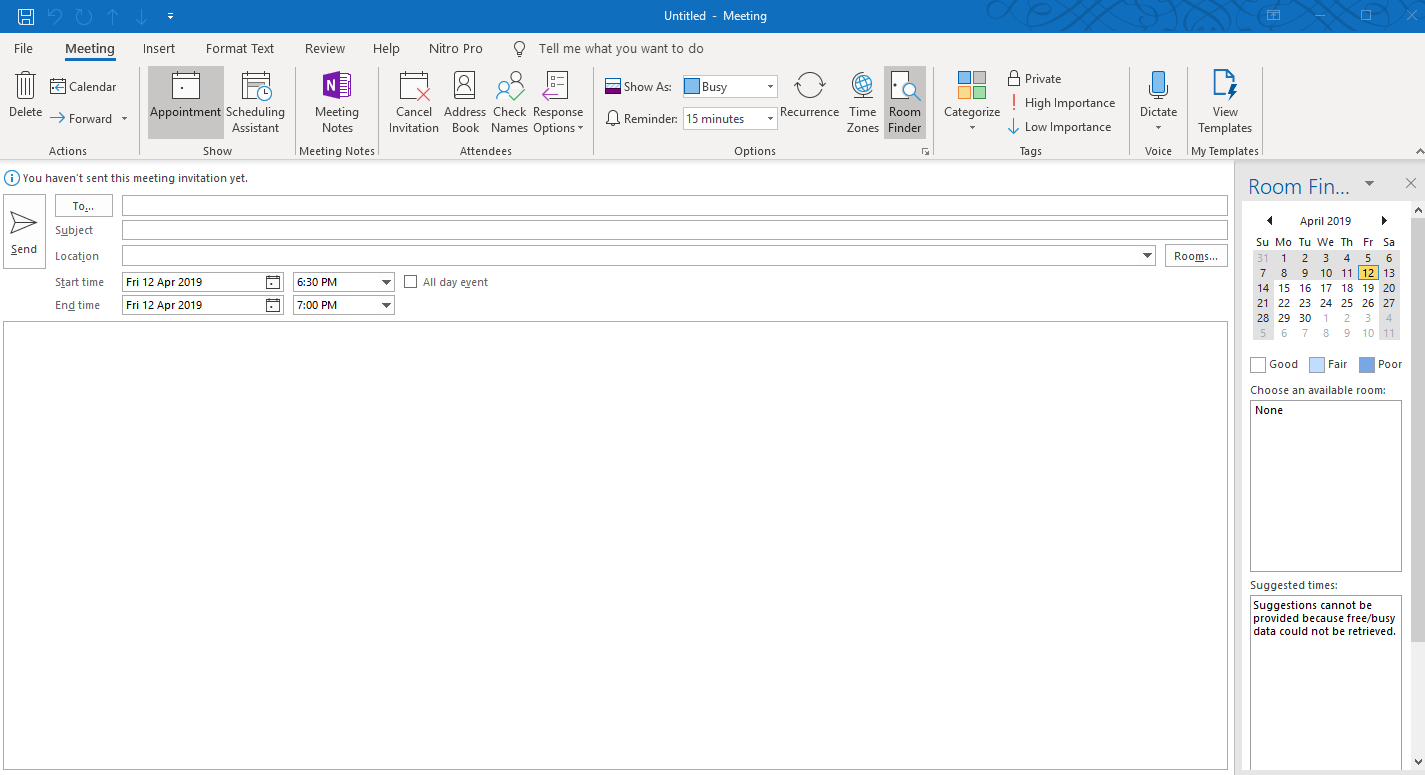
This new window resembles the new message window, with some customizations for this specific function. It’s in this meeting window that you will create your meeting invite and send it to your intended attendants, the email recipients.
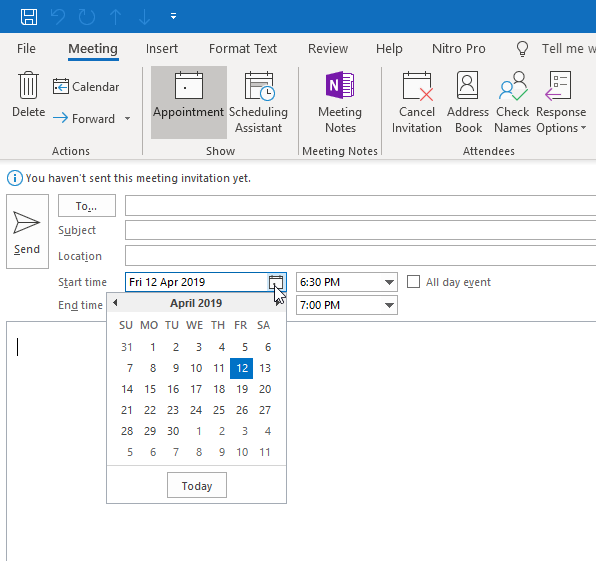
To start, look at the fields. This meeting window till have fields for Location and one for the meeting start and end times. Select where you want the meeting to take place. You can also set the start and end time of the meeting after selecting the intended date when the meeting will be held.
This meeting window also has a body, like in a regular email composer window in Outlook. However, this time, the “body” is where you can add additional details or guidelines for your meeting, such as the meeting agenda.
You may also attach any relevant files that are needed in preparation for the meeting. You can easily do this by opening the Windows File Explorer, selecting the file that you want, and dragging and dropping the file onto the meeting window.
Easily Send Invites and Use Convenient Reply Features
Once you have included all the details of your meeting, you can then go to the “To” field to add everyone you intend to invite to the meeting. By default, Outlook meeting invitations require the recipients to respond by either accepting or rejecting the invite, like an RSVP. Your recipient/s may also suggest alternative times or dates to reschedule the meeting if in case they are unavailable.
This ready option to reply or RSVP is highly useful, as your colleagues, clients, or the recipient of the invitation to meet may also be very busy. They may easily overlook your meeting invitation or they may not easily or promptly confirm, which may create a problem for you especially when it comes to crucial meeting schedules.
Having this meeting invite in Outlook allows you to be on top of the meeting, ensuring that everyone knows where and when the meeting will be, and can come prepared. Replying to the invite also enforces meeting invite etiquette, which benefits everyone in the long run.