How to Create a Simple Mosaic in PowerPoint
PowerPoint let you create all kind of amazing backgrounds and designs for your presentations. If you want to delight your audience with awesome mosaics created in PowerPoint then here we will show you a simple process to achieve it.

Basically this strategy will rely on the grouping feature of PowerPoint shapes and then fill the background with a custom image. You can use any image you choose to use as a background, but the most important step here is to create a group with your desired shape.
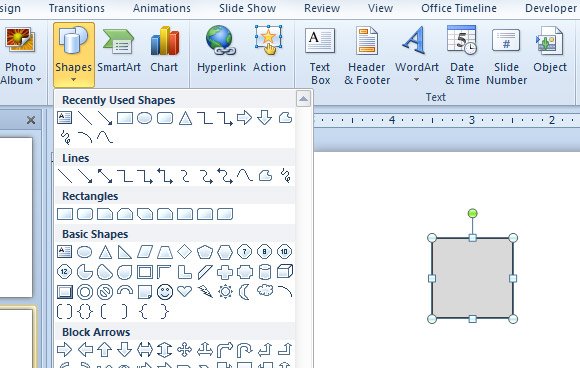
To achieve the mosaic Effect in PowerPoint 2010 we will start creating a mesh of square shapes in the slide. So you can start creating the first squared shape.
Notice that you can create single shapes and then duplicate (CTRL-D) to create the second one in the row. If you move the second shape to the position on the right, then every time you press CTRL-D the new shape will be duplicated in the correct position. You can then select the entire row to duplicate the shapes and create the second row and so on.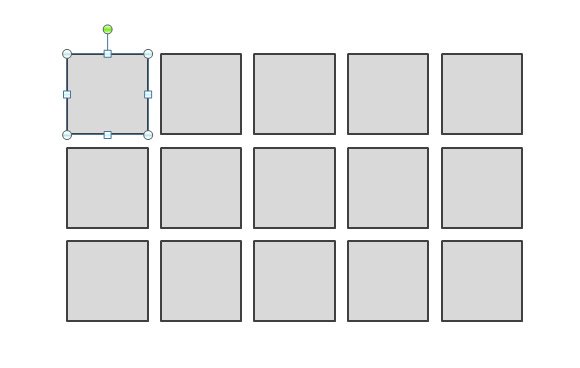
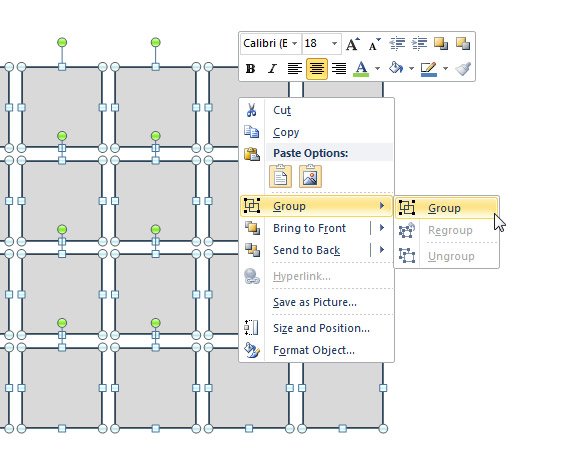
Then, when you are done creating the mosaic template we will group the shapes. Select all the shapes and then right click over the selection to choose Group -> Group.
Now it is time to choose the background to be used in the mosaic. Right click over the grouped shape and then choose Format Shape. Now choose Fill and Picture or texture fill. Here you can pick the image file from your computer.
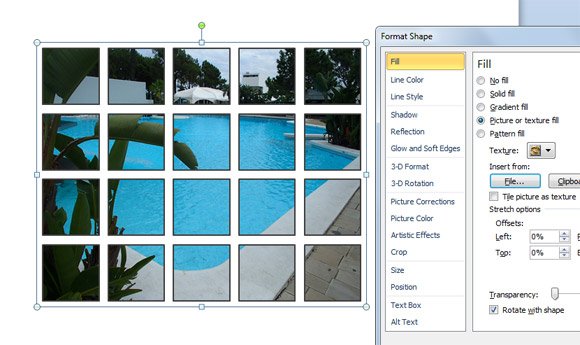
You can also edit the square properties like the border line color and width, in order to make realistic mosaics with awesome effects. In the first figure in this post we have edited the border to use a thin white line instead of the dark border.
Using this simple method you can create awesome backgrounds and PPT templates for PowerPoint presentations with stunning mosaics and your own pictures.