How to Copy Exact Position of PowerPoint Objects
PowerPoint has always been the go-to presentation tool for many. From beginners to students to professionals, PowerPoint has been a reliable tool for delivering small to large amounts of information. Over the years, the slide-based application has developed features and tools that allow presenters to create captivating and visually interesting presentations. Aside from straightforward texts in all sorts of font styles, colors, and sizes, you can also insert images and shapes, create diagrams and charts, and animate your slide elements. You may also link an Excel spreadsheet to your slides, especially when working with graphs. Here is a quick tip on how to copy exact position of PowerPoint objects when making your slides.

Copy the Exact Position of PowerPoint Objects
Typically, a slide may contain three to five elements. Working with these can be a breeze, but when you’re talking about complex slides and objects with 10 or more elements, then that’s when it becomes very tricky. This is why PowerPoint also has a link and group feature so that you can link selected objects in your slide so that you can easily move and manipulate them. Aside from grouping or lining together, you may also use alignment and snapping guides to help you keep things organized and not out of place.
If you’re working with numerous slide elements for each slide and you have numerous slides that you still need to work on, this can be a big hassle. It can get time-consuming, not to mention draining. Now, once you have opened your own presentation, you may also try to do the above tips. Additionally, you may also need to learn how you can copy a set of PowerPoint objects and paste them in the exact same position or alignment as the original.
Position Your Objects in the PowerPoint Slide
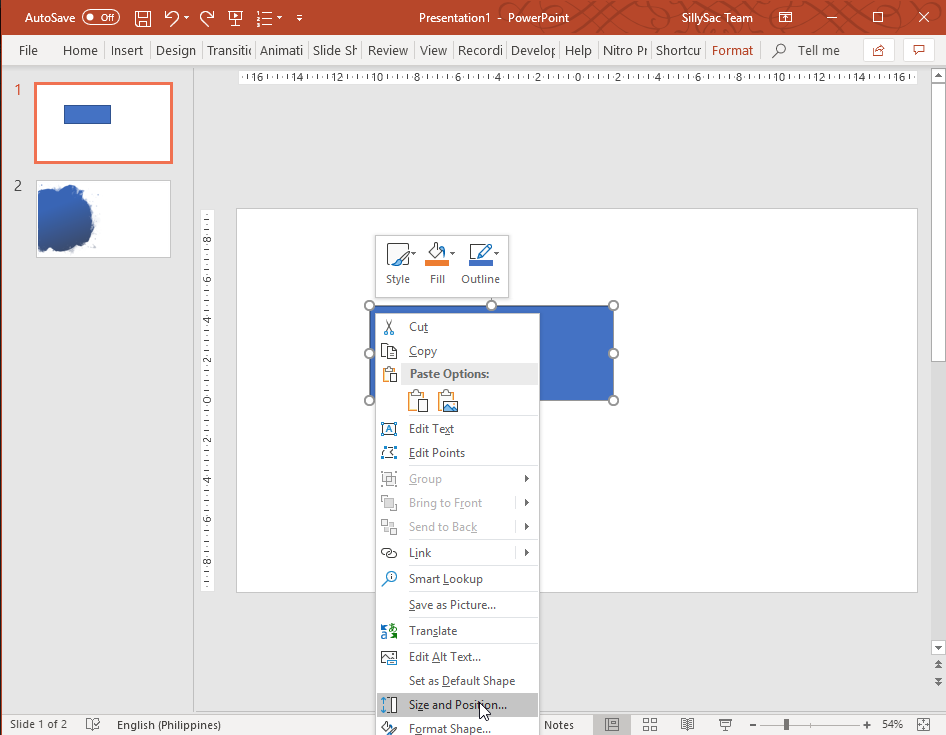
If you have a PowerPoint presentation already made and this is what you want to manipulate, then open the presentation. If you don’t have a ready presentation, just open a new presentation and insert any object. In our example, we will create a rectangular shape and position it anywhere in the slide. Then, right-click it and select Size and Position from the menu.
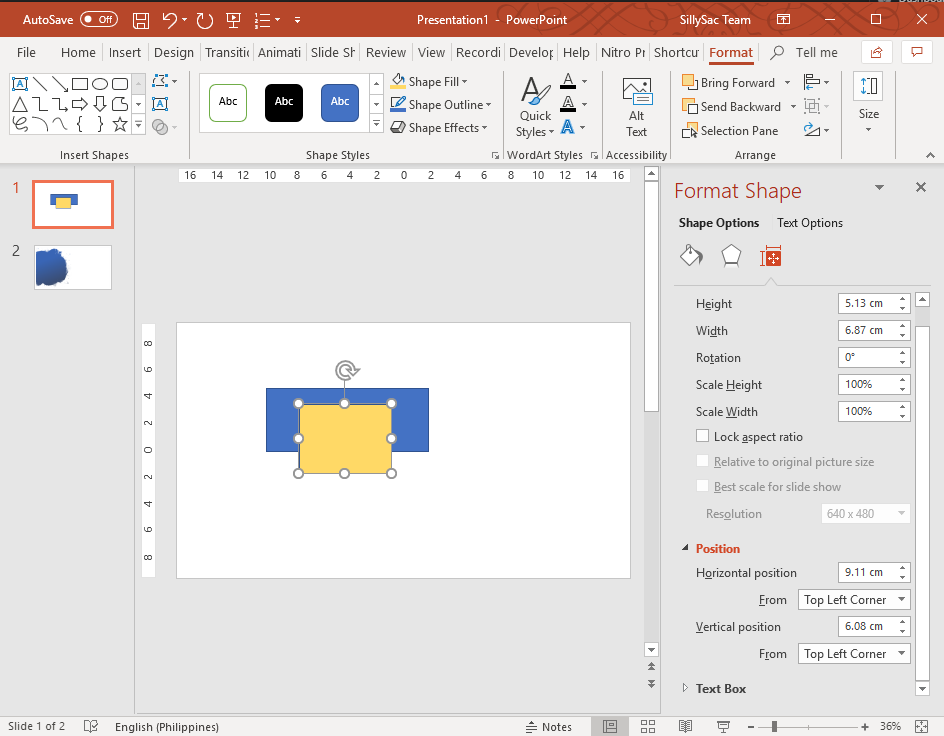
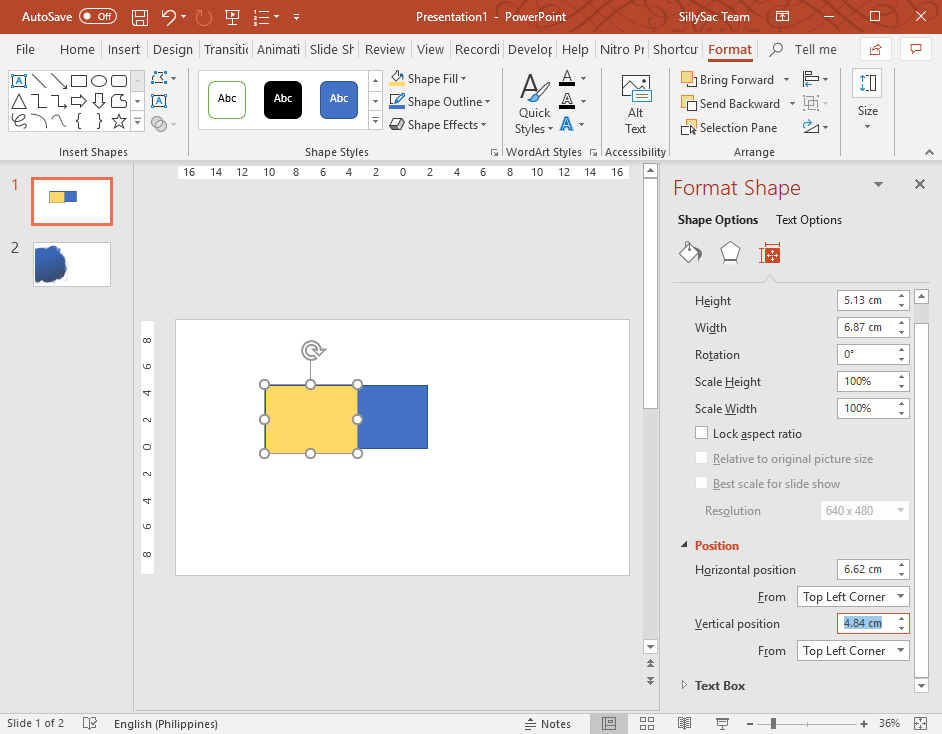
Once you click the menu, a properties panel on the right will populate. It has a dedicated section for setting the Position. The Position is set in centimeters as the default. Note the location of the shape on the horizontal ruler or X-Axis, and the vertical ruler or y-axis. To copy the shape in this exact position, you have to note the two location values down. Next, insert a second object. Right-click the object and select Size and Position once again in the menu. It will have its own coordinates, as it is positioned differently than the first object. To make the two objects have the same position, you can enter the coordinates in the panel.
Then, you will notice that the two objects have lined up following the top-left corner of the first object. They have different sizes, so you can still see how the shapes “stop” at different times.
You can do the same with other objects. Even if other objects or shapes are not linear or regular as the rectangle in our example, you can still expect that the shapes or objects you use will be in alignment when you follow this simple instruction.