How to Create a Multi-level List in PowerPoint
Multi-level lists can be really helpful to organize the data better in a PowerPoint slide. Here we will show you how to make a multi-level list in Microsoft PowerPoint 2010 so you can display information hierarchically in your PowerPoint presentation.
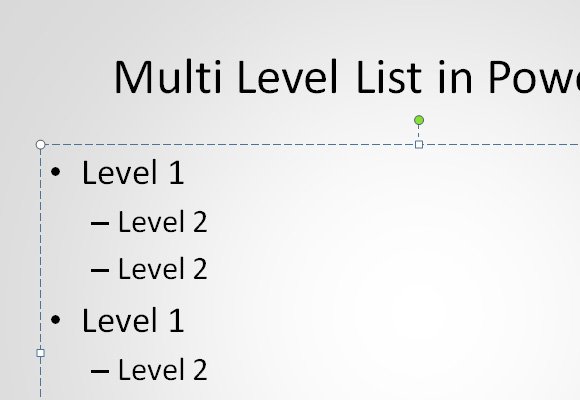
To create multi-level bulleted lists in PowerPoint you can type in the text lines as usual. Then, for those level that you want to move to a new level you can put the cursor at the beginning of the line and then click TAB key. This will add an extra level to the list and the line will receive an additional indent. Depending on the PowerPoint template that you chose, the new level of indent will receive a new bullet icon.
To reduce the number of levels you can press Backspace which will remove the indentation and return to the previous level.
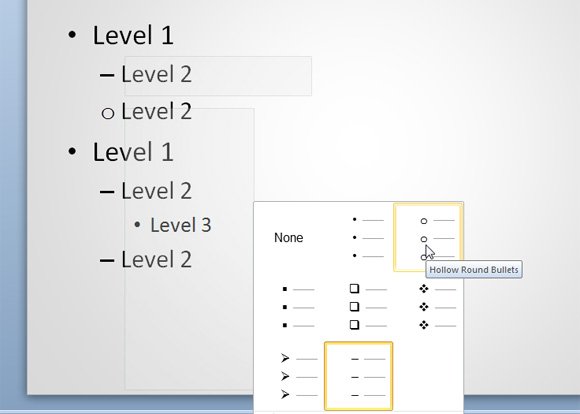
You can also change the bullet symbols used for the multi-level list. In order to change the icon or symbol used for the list, you can right click over the level that you want to change the symbol and then click Bulleted List and then Paragraph group. In this figure below you can see how we changed the bullet list to Hollow Round Bullets, but you can choose from multiple bullet styles including arrow bullet, filled round bullet, square bullet points, etc.
You can choose your own icon if you are creating a corporate or branded PowerPoint template for your presentations. To choose a different icon or symbol, click the Bullets and Numbering option, then in the dialog box that appears, click the Customize button.
Alternatively, you can learn how to align bullet points or change the bullet point icons in PowerPoint.