Using VBA to Export PowerPoint Slides to Images
We already have posted about how to use C# to programmatically export your slides to images, but today we’d like to show you an easy way to export your active presentation to images using VBA code. This can be very handly if you want to make a PowerPoint add-in using VBA and Macros and for example add a custom toolbar to the Ribbon. This way, you can easily export your slides to images or any other format without leaving PowerPoint. For us, this was very helpful when we design our free PowerPoint templates because we can easily save the slides as images. You can tweak the following snippet to change the export properties, for example to export as PDF or PNG instead of JPG, or change the output image size.

Using VBA to Export PowerPoint Slides to Images
First, we are going to create a simple macro that will ask for the output directory. You can use the FileDialog object to ask for a directory. It is also used for files, but we are going to use it to ask for an output directory with the msoFileDialogFolderPicker type (learn more about FileDialog types here).
Sub ExportHTML(ByVal control As IRibbonControl)
    Dim path As String
    path = GetSetting("FPPT", "Export", "Default Path")

    With Application.FileDialog(msoFileDialogFolderPicker)
        .InitialFileName = path
        .AllowMultiSelect = False
        .Title = "Select destination folder"
        .Show
        If .SelectedItems.Count = 1 Then
            path = .SelectedItems(1)
            Save_PowerPoint_Slide_as_Images (path)
            MsgBox "Saving slides to " + path
        Else
            MsgBox "Nothing was saved"
        End If
    End With

    If path <> "" Then
        'Open path For Output As #n
        SaveSetting "FPPT", "Export", "Default Path", path
    End If

End Sub
Notice that we have also added a few lines of code to get the path and save path as a setting in the Windows registry. This way, you can easily use this as a PowerPoint add-in and will keep the last path you chose. This was extremely useful in our case, preventing us to select the output directory every time and saving us a lot of time.
Export the Slides as Images
To save the slides as images, we have used the simple subroutine and VBA code example from this blog VBA Tips & Tricks. We have adapted this code a bit to add a prefix with the name of the active PowerPoint presentation, filename without the extension. You can easily change the prefix variable to any desired value. Also, instead of using the slide object name we have replaced it to use the SlideIndex. This way, if you re arrange the slides or remove slides from your presentation, the output won’t be affected and your slides will be numbered from slide 1 to slide N, where N is the total number of slides in your PPT presentation.
Here is the subroutine that will export the slides as JPG images.
Sub Save_PowerPoint_Slide_as_Images(path As String)
    Dim sImagePath As String
    Dim sImageName As String
    Dim sPrefix As String
    Dim oSlide As Slide '* Slide Object
    Dim lScaleWidth As Long '* Scale Width
    Dim lScaleHeight As Long '* Scale Height
    On Error GoTo Err_ImageSave

    sImagePath = path
    sPrefix = Split(ActivePresentation.Name, ".")(0)
    For Each oSlide In ActivePresentation.Slides
    sImageName = sPrefix & "-" & oSlide.SlideIndex & ".jpg"
    oSlide.Export sImagePath & "\" & sImageName, "JPG"
    Next oSlide

Err_ImageSave:
    If Err <> 0 Then
    MsgBox Err.Description
    End If
End Sub
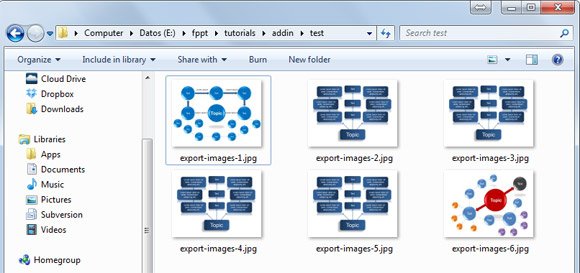
As soon as you run this code, it will export the current slides as images.
Did you know? If you want to get the filename of your active PowerPoint presentation then you can easily use this line of code:
Split(ActivePresentation.Name, ".")(0)
Alternatively you can right click and then choose Save As… however using VBA code you can programmatically create macros to streamline the process of saving PowerPoint with lot of slides. You can also export your work to HTML and then get the images from the output folder.
