Annotate as You Record Your Videos with Movavi Screen Recorder

Recording your desktop screen to make videos has been a trend that is no longer limited to people making video tutorials, video game walkthroughs or app demos. As working from home becomes a norm, it has also become convenient for many people to make a short screencast to demonstrate different concepts, record a PowerPoint presentation and even to report bugs and technical issues. Screencasts in such a case can help make up for the lack of physical contact amidst the COVID-19 pandemic and mandatory work from home policy that many people now consider the new normal.
Keeping in mind the need for recording content and also making sure everything appears easy enough to explain, the added advantage of annotating your screen as your record a video or even take a screenshot can be of immense help. Movavi Screen Recorder combines screencast and screenshot-taking capability with the addition of handy annotation tools. Movavi Screen Recorder starts also provides a number of other handy features including the option to record your audio and trim recorded content on Windows or Mac. 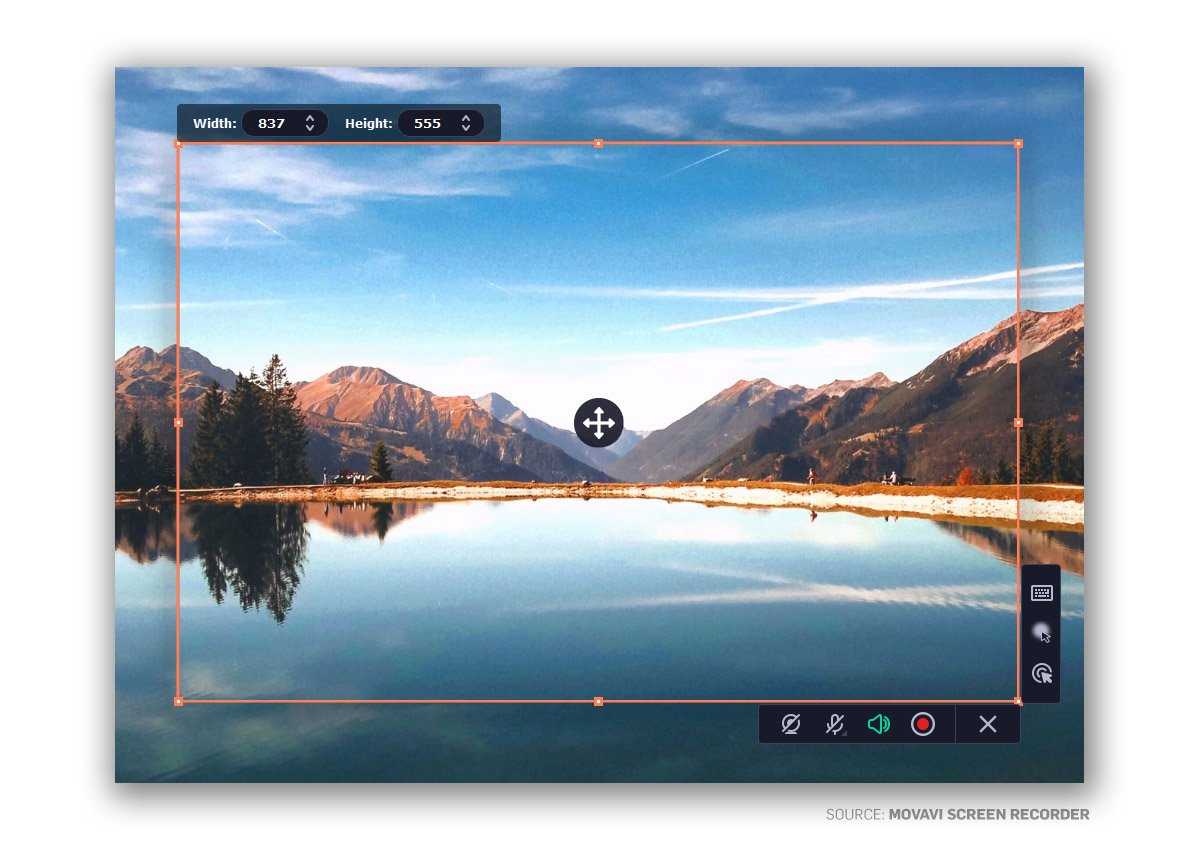
Getting Started with the Movavi Screen Recorder
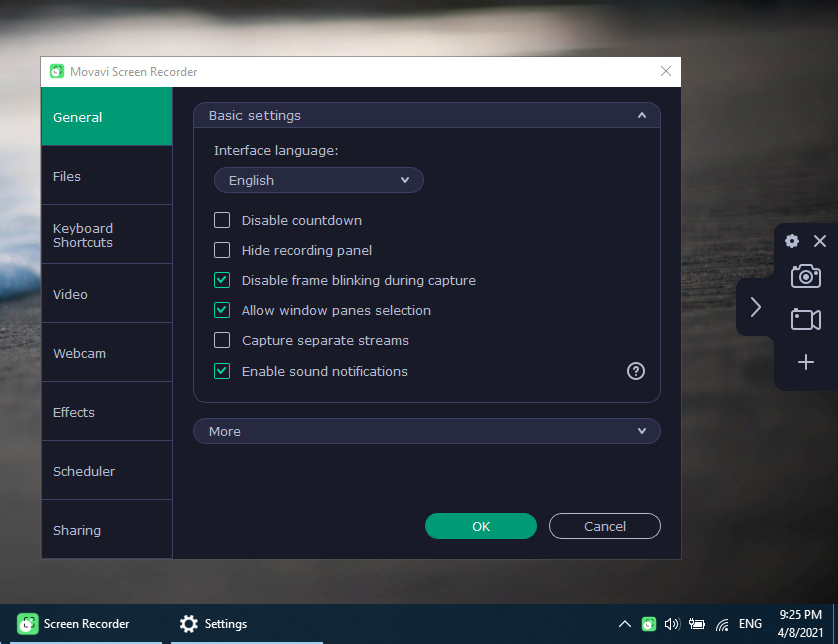
Once launched, the Movavi Screen Recorder sits in the taskbar with an overlay menu that can be dragged across the screen according to your convenience. The Settings menu provides you with the default settings that you can tweak to get the hang of the application. For example, you can set custom keyboard shortcuts, configure, audio and video quality settings, on-screen cursor settings and log in to your Google Drive or YouTube accounts to export your recordings.
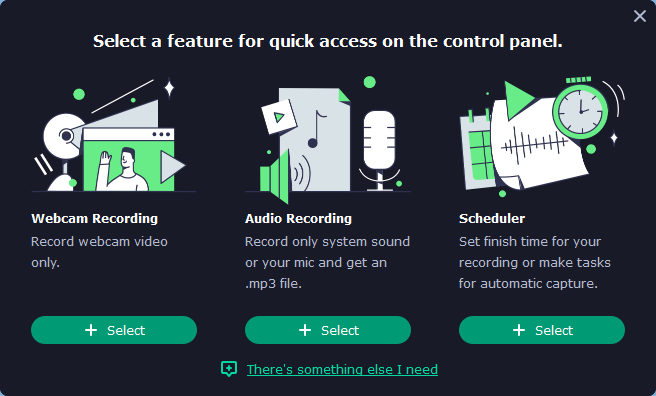
The main interface consists of the screenshot and screen recording options, as well as the ‘+’ button which opens a menu for quickly launching the quick access menu to make a video, record audio or schedule your recording.
The latter is another handy feature that enables automatically capturing video according to a scheduled time.
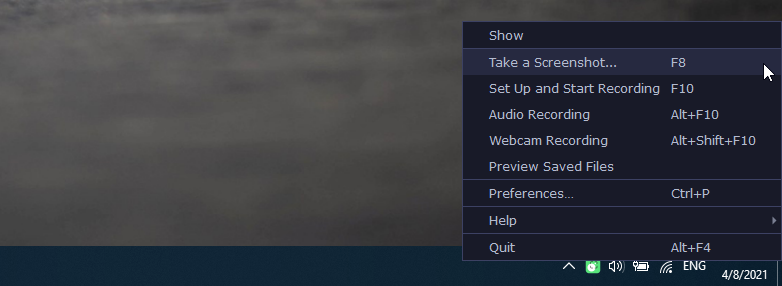
Another way you can access the app features is via the context menu from the taskbar. This menu also shows the various hotkeys related to different application features.
Taking and Annotating Screenshots
The screenshot tool is by default linked to the F8 hotkey. You can also use the onscreen panel or taskbar context menu to launch the tool. Once launched, you will be able to pick the area you intend to capture. The basic screenshot options are similar to other screen recorder tools like Greenshot, but Movavi provides better screen annotation options and user experience.
Once your screenshot is captured, you will be able to instantly annotate, save or share it. The sharing options include generating a direct link, WhatsApp, Telegram, Email and Google Drive.
There is also an option to add the screenshot to the clipboard for pasting in an app.

For onscreen annotation, you can add text, insert arrows, lines or use the highlighter or frames. While the annotation options are good for highlighting a part of your screenshot, the screenshot tool does seem to lack some features found in other screenshot tools such as the ability to capture scrolling web pages from an Internet browser or the option to bind different hotkeys for capturing parts of your screen. This is perhaps due to the fact that this is more of a screen recording tool with the addition of screenshot features.
Recording Your Screen
When it comes to screen recording, Movavi Screen Recorder provides more than a handful of options. The screen recorder starts off with a similar selection interface like the screenshot tool, allowing you to pick the area you intend to capture.
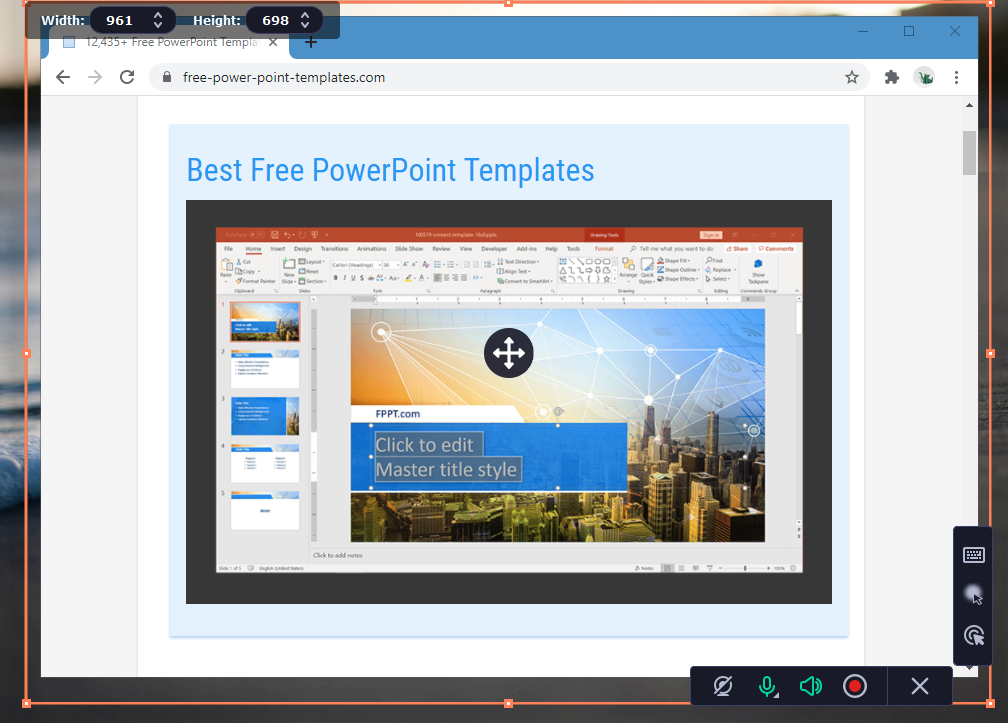
After selecting the desired area to record, you can enable your webcam, mic and sound from the bottom of the menu. before you hit Record, make sure you configure the rest of the desired settings from the right of the panel. This includes the option to record mouse clicks, the option to highlight the cursor and the utility to record all keystrokes or keyboard shortcuts, as you make your video.
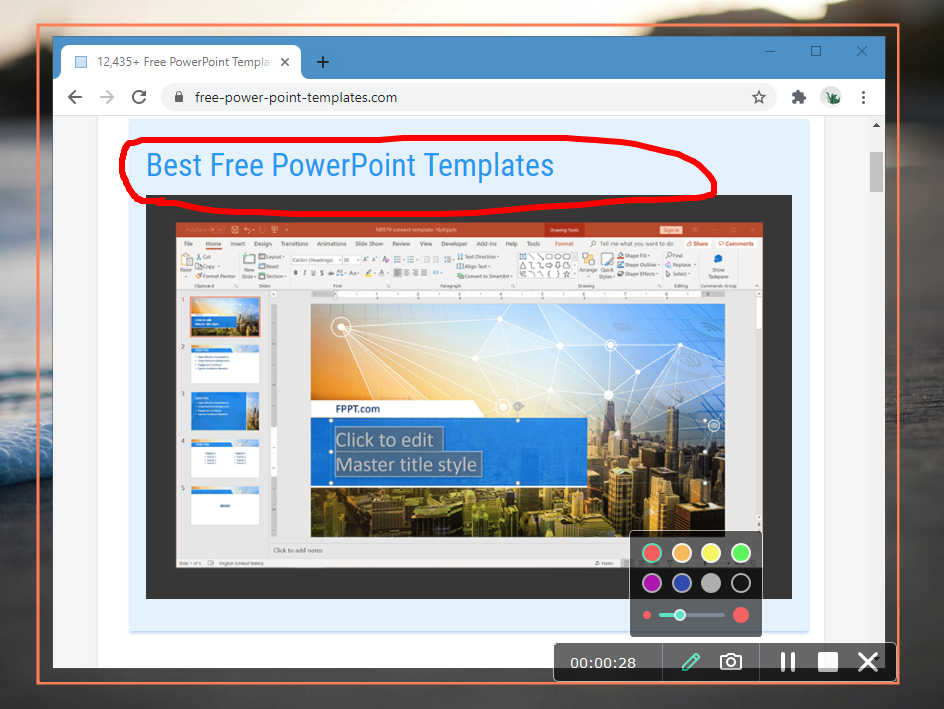
As you record your video, you can continue to annotate it and take screenshots using the F8 hotkey. You can use the F9 hotkey to Pause and F10 to Stop the video or use the onscreen buttons.
Trimming Recorded Videos
The video trimming utility instantly opens up after you stop recording. You can also export and share your video from within this utility. You might notice the video editing button at the bottom. That requires using the Movavi Video Editor.
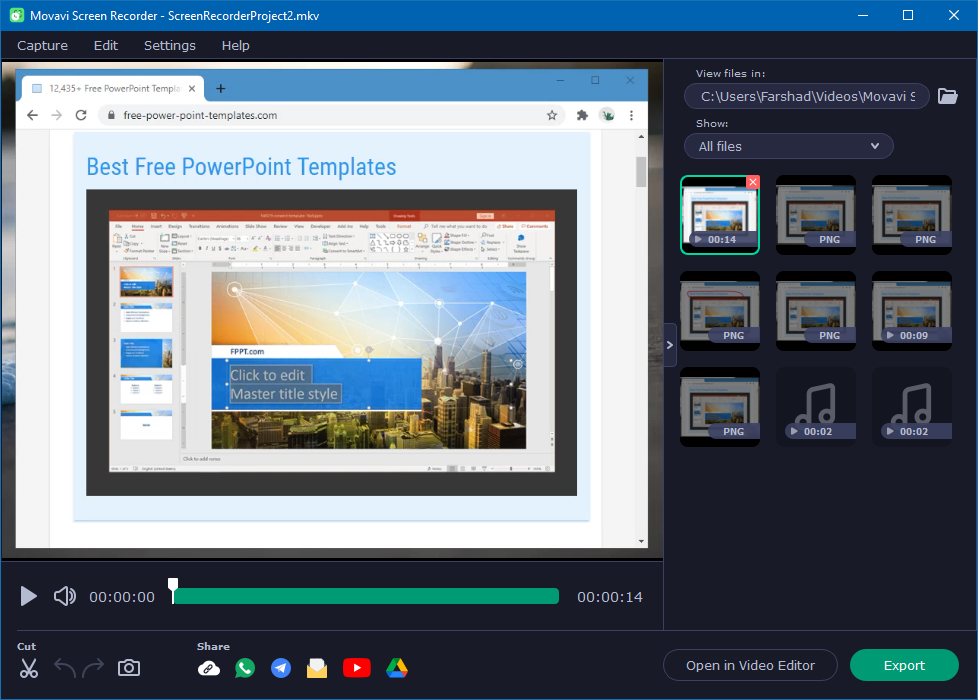
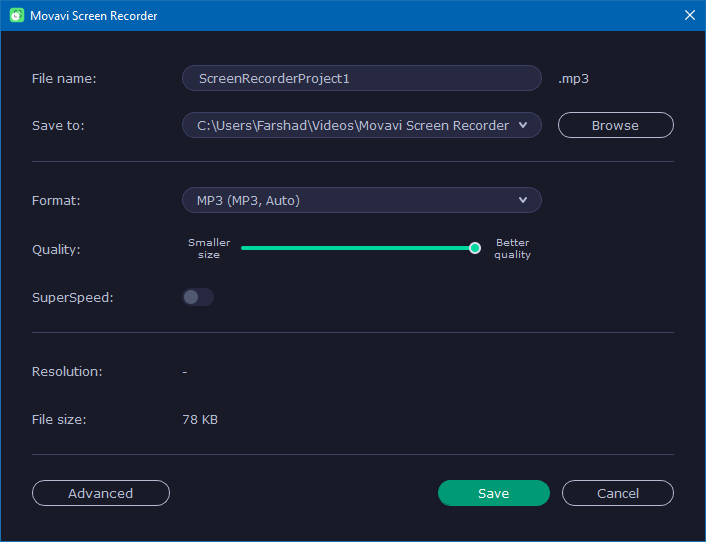
Once you hit Export, you will be provided with additional settings to manage your video recording settings including the file name, output folder, video quality settings and the format you intend to export it in. Movavi Screen Recorder allows exporting recordings in MP4, AVI, MOV, MKV, WEBM, MP3 and GIF formats.
Recording Computer or Mic Audio
The audio recording utility allows you to record either the computer sounds or you can opt to record your microphone sound, such as when recording a voiceover. Alternatively, you can opt to use a free online voice recorder tool and download the MP3 file to use in Movavi.
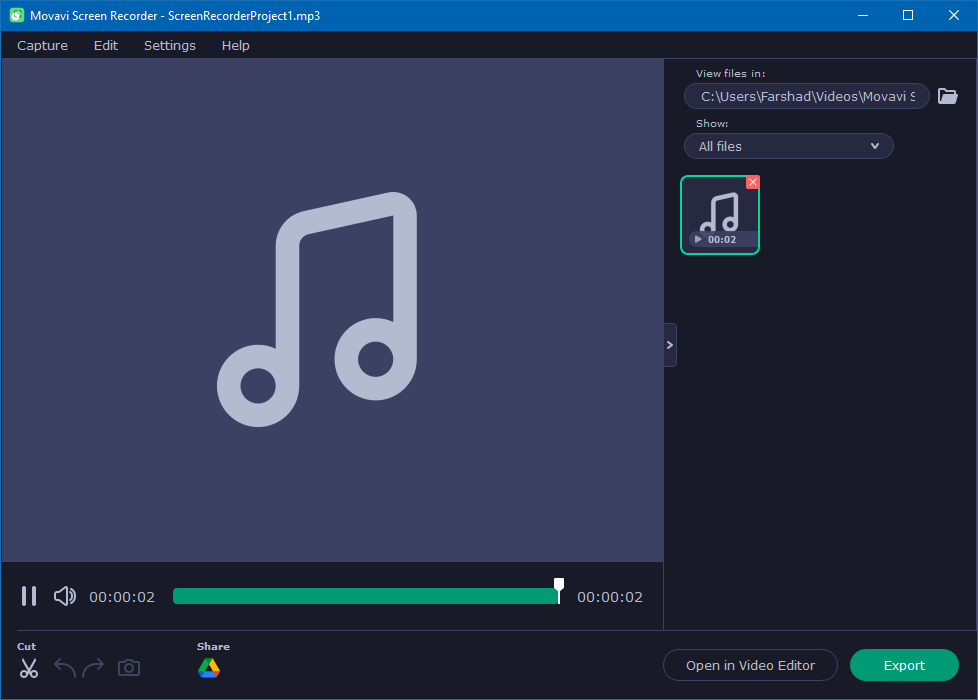
The recording utility instantly opens the trimming tool after the completion of the audio recording. To use the recorded audio in your videos you will require a video editing application, e.g. the Movavi Video Editor.
Final Words
The Movavi Screen Recorder serves as a useful screen and audio capturing utility. It can be a handy tool for not only making videos for your YouTube channel but also for recording a webinar you might be conducting or viewing or perhaps a remote meeting session. The ease of use of Movavi makes it a reasonable option for people looking for a screen recording utility that is not too complicated or overly expensive.
While some advanced users might crave advanced video authoring features offered by expensive options like Camtasia Studio or Adobe Captivate. Some of these features can be acquired if you opt for the Movavi Video Suite. However, the interface of Movavi rids it of complicated features that the average user might never require using. While avoid breaking the bank when purchasing a screen recorder that gets the job done in a hassle-free manner.