How To Add Header And Footer To Slides in PowerPoint 2013
Adding a presentation title or the name of an organization on presentation slides may be necessary at times. The best way to do that is to make it a part of the header or footer, where you can add the required text and try to make it as unobtrusive as possible.
How To Add a Header And Footer in PowerPoint 2013
Step 1. Go to the Insert tab in PowerPoint and click Header & Footer (as shown below).

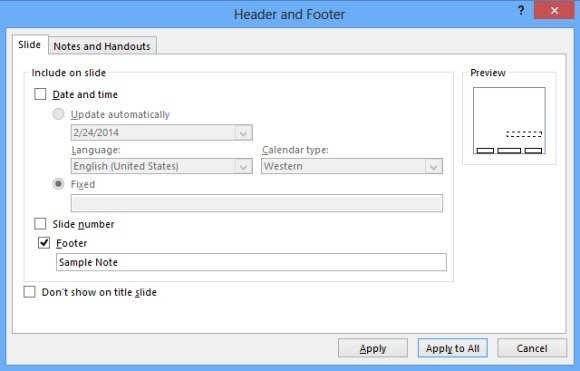
Step 2. This will open the Header & Footer dialog box. From the Slide tab, click the Footer check box, and type in your required text. From here, you can also add date and time to your slides.
Step 3: To display the text on a selected slide, click Apply or use Apply All to add the text to all slides.
Note: To prevent the text from appearing on the main slide, check “Don’t show on title slide” option.
Step 4. Once the text has been added you can edit the text and time stamp using basic font formatting options from the Home tab.
To add text to the header, follow the steps mentioned above and simply drag the textbox to convert the footer into the header (as shown below).

How To Add Header And Footer To a Handout or Notes in PowerPoint 2013
To add a header or footer to handouts or notes, follow the same process mentioned above and simply select the Notes and Handouts tab from the ‘Header and Footer’ dialog box. The specific steps for this process are mentioned below.
Step 1. Go to the Insert tab in PowerPoint 2013 and select Header & Footer.
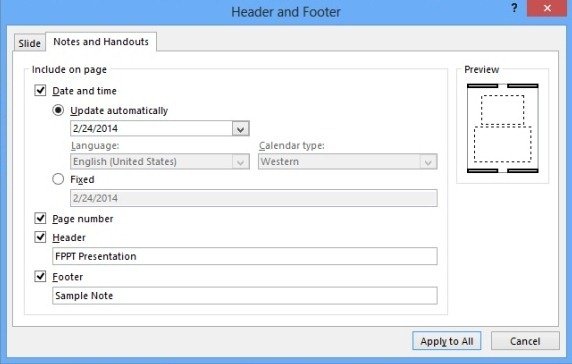
Step 2. From the Header and Footer dialog box, select the Notes and Handouts tab.
Step 3. Check the Header and/or Footer check box, type your required text for notes page or handout.
Step 4. Click Apply to All.