Create Financial Statements Easily in Excel using Checkbook Assistant Add-in
Financial statements are one of those crucial financial documents that you need to prepare as a business entity. While there are many apps and software that can help you create these, Microsoft Excel has everything you need to make financial statements–all for free. So, why should you shell out unnecessary expenses when you can easily create financial statements right within Excel? Checkbook Assistant add-in for Excel can help you create financial statements easily in Excel.
Financial Statements are a Breeze in Excel
Creating financial statements, as well as other financial documents can be a breeze in Excel. While for some with limited financial and Excel background may find this task daunting, the key here is to start. Brush off those hesitations and open up an Excel spreadsheet and in time, you’ll see how easy it is to create financial statements like a pro, especially since your business depends on it.
Besides, Microsoft offers a wide range of add-ins that extend and expand the functionality of your Office programs such as Excel. One great add-in that you can use for financial statements is Checkbook Assistant.
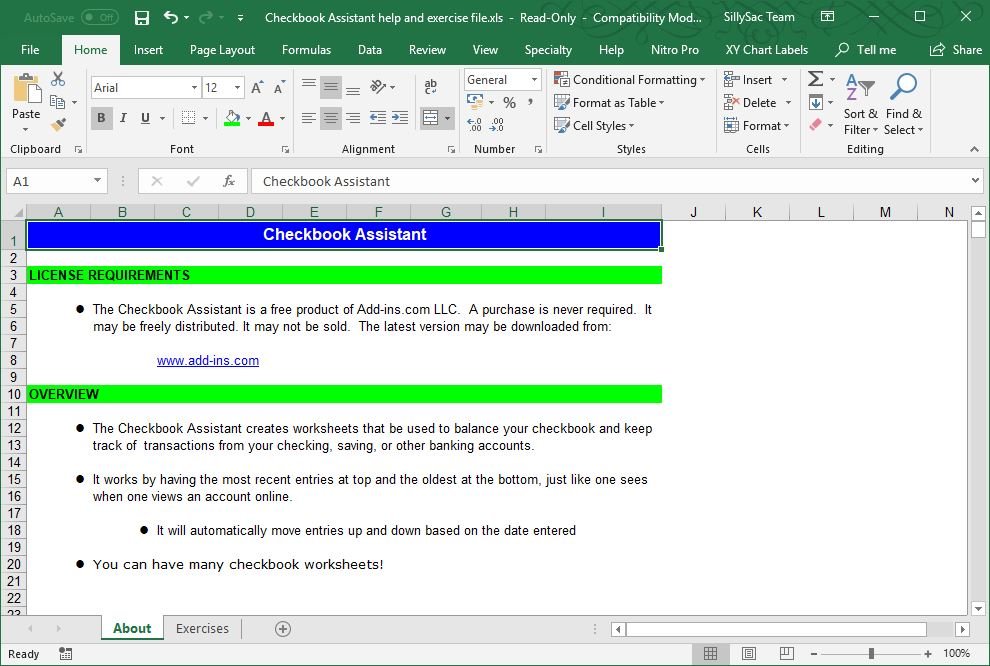
Checkbook Assistant is an Excel add-in that you can easily use even without any financial or accounting background. If you’re familiar with Excel spreadsheets, then working with this add-in will be a breeze because it seamlessly works within Excel. You don’t have to learn a new app, much more download a new one, because you’re basically just powering up Excel with this add-in, extending Excel’s functionality so you can make the most of it.
Create a Checkbook Register with Checkbook Assistant Add-in
Checkbook Assistant can help you get a hold of your checkbooks and make the most out of Excel. You can be on top of your finances and not forget about your receivables or payables with this add-in.
The Checkbook Assistant can also help you with your bank statements. The add-in seamlessly works within Excel, so you can create statements easily from the data you have in your spreadsheet and manipulate this data however you like. You can even visualize the data and embed or insert them in documents or presentations, as well as other spreadsheets.
Then, if you want to customize your spreadsheet for your own needs and finances, you can easily add columns and rows.
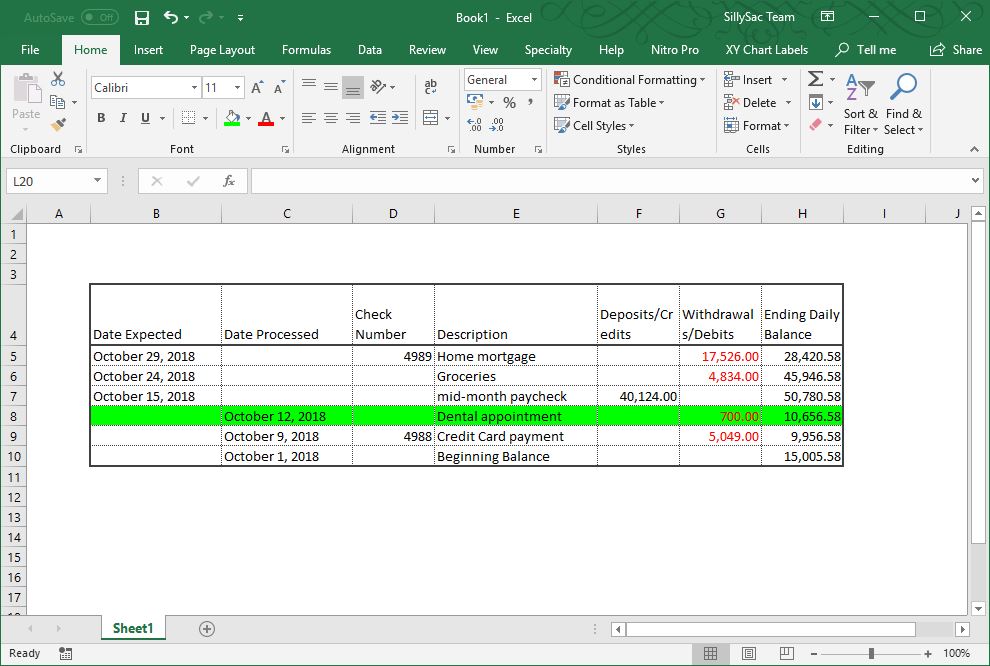
Easily Create Bank Statements with Checkbook Assistant
In this add-in, you will see that the order of the entries and how it is structured is the same as a typical bank statement. Your latest transactions are on top. You won’t also easily get lost among rows of data because the latest processed row willl be in green highlights, so you know where you left off. Then, the transactions that have not been processed by the bank have an expected date and are on top of the processed transactions so you know what your next steps are.
Then, you can make use of the toolbar where you can arrange your transactions in the same order as in a bank statement, so the structure is more familiar to you. You can also use this to create your own bank statement.

Use the Toolbar to Navigate Your Bank Statements in Excel
To use the toolbar, you have to first familiarize yourself with the buttons. The first button is the insert button, which allows you to insert rows anywhere. The next two buttons are arrow buttons that let you move up and down the rows. Then, the last button, the menu button, opens your menu for settings.
Then, if you want to insert a new transaction, the Checkbook Assistant can help you easily input it. You don’t have to be lost in the rows and columns and even risk feeding errors in your spreadsheet. Just use the dialog box that comes with the add-in.

Here, you just need to enter the transactions that are shown on your bank records and arrange them to be in order as the bank’s webpage. Furthermore, you can also arrange your data according to the dates you input under Date Expected or Date Processed. You can download Checkbook Assistant for free from the link below.