All About The Split Transition Effect In PowerPoint
Last updated on May 5th, 2024
Transition effects in PowerPoint enable users to add attractive effects to make good use of their imagination and to make their slides less monotonous. If you get a little creative with the PowerPoint Transition Effects, you can really amaze your audience by morphing one slide from the other. For example, you can use the Fade Transition Effect to fade one slide to reveal the other or use the Push Transition Effect to push one slide to show the next one.
Similarly, you can use the Split Transition Effect in PowerPoint to split the current slide to show the next one.
How to Apply the Split Effect to PowerPoint slides?
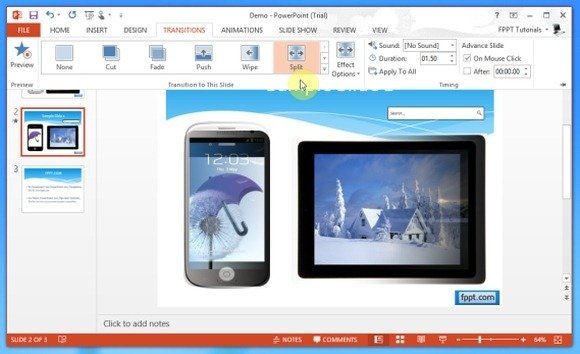
The Split Effect can be applied in a number of ways to reveal the next slide or to go back to the previous slide, in style. After the transition has been applied, you can go to Effect Options to select how the split appears. The available options include; Vertical Out, Vertical In or Horizontal Out or Horizontal In. The below image shows the Split Transition Effect and how to apply the split transition and change the effect options to horizontal out.

How To Apply The Split Transition Effect
To see the process of applying the Split Transition Effect to presentations in Microsoft PowerPoint, see our video tutorial given below. As mentioned earlier, you can always use Effect Options to change the direction of the Split effect. In case you wish to create presentations like our sample slide given below, then do see our post about the spectacular PowerMockup add-in for PowerPoint.
Final words
In this article, we explained how to apply split transition in PowerPoint so you can split the transition effect while preparing your slides.
