How to Wrap Text around an Image in PowerPoint: A Quick Guide
PowerPoint, a widely-used presentation software, provides numerous features to enhance your slides visually. One of these powerful features is wrapping text around an image. In this article, we’ll guide you through the quick and easy steps to master this technique.
Understanding Text Wrapping
Text wrapping in PowerPoint refers to the process of formatting text to flow around a shape or image, rather than overlaying or sitting separately from it. Though PowerPoint doesn’t have an automatic text wrapping feature like Word, we can create a similar effect using a few simple steps.
Sometimes it is required to wrap text around an image in PowerPoint, be it because you are preparing a business report, a flyer or just designing a presentation slide in which you need to wrap text around a photo.
Unlike other Microsoft Office products where you can align text or wrap text around images, in Microsoft PowerPoint this can be challenging at a glance. In this article, we will see how to wrap text in PowerPoint around an image.
Steps to Wrap Text Around an Image in PowerPoint
Step 1: Insert Your Text and Image
First, you need to insert your text and the image around which you want the text to wrap. Click on the “Insert” tab, choose “Text Box” or “Picture,” and place them on your slide.
Step 2: Position the Image
Next, position your image in the desired location on the slide. You might want it in the center, corner, or somewhere else depending on your design preferences.
Step 3: Divide the Text
Now, divide your text into smaller text boxes so you can easily arrange them around the image. It’s easier to maneuver smaller pieces of text around an image rather than one large text box.
Step 4: Arrange the Text
Drag and place the text boxes around your image. You can use the arrows on your keyboard for slight adjustments. Make sure the text flows naturally and is easy to read.
Step 5: Fine-Tune Your Slide
Lastly, adjust the font size, color, and spacing to improve the overall look and readability of your text. Remember, the goal is to make the information easily digestible for the audience.
Recap
But in simple words, if you need to wrap text around an image or shape in PowerPoint, the space bar and keyboard shortcut Shift-ENTER could be your best friends.
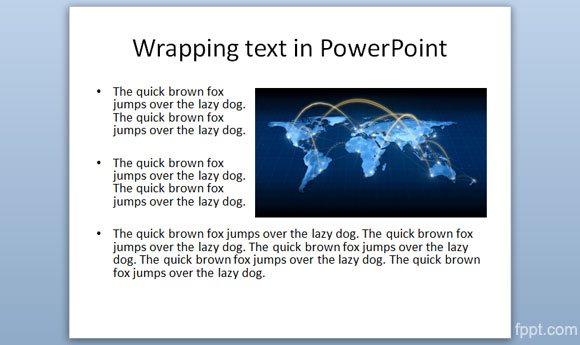
In this example above, we placed a world map picture in the slide design, and then we added some paragraphs with bullet points at the left; you can learn how to wrap text in PowerPoint.
Also, in some situations you may need to use an irregular shape or picture and wrap the text around it, or use a rectangular or regular shape or picture instead.
The way we wrapped text here around the image was very simple. Just before overlapping the text with the image, click Shift-ENTER to add a line break.
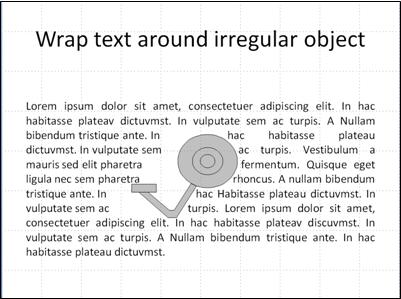
In this last example we are showing you how to use the space key inside a paragraph to leave space for an irregular shape or picture.
If you need some text for testing purposes, try to use the =rand() function to add some random text. We hope this article will be useful for next time you need to wrap text around picture in PowerPoint presentations.
Advanced Techniques: Grouping and Layering
For more complex arrangements, you can use the “Group” and “Layer” features in PowerPoint. Grouping allows you to join multiple objects and move or format them together. Layering enables you to control what’s in the foreground and what’s in the background.
To group objects, select the items you want to group by holding down the “Ctrl” key while clicking each one. Then, right-click on one of the selected items and choose “Group.”
For layering, right-click on an item and select “Bring to Front” or “Send to Back” as needed. This will allow you to layer your text and images precisely as you envision.
Conclusion
Although text wrapping around an image in PowerPoint can seem tricky at first, it’s quite simple once you get the hang of it. Follow these easy steps and your presentations will have a professional and visually pleasing appearance. Remember, practice makes perfect, so don’t be afraid to experiment with different layouts and designs.