What Are Motion Paths Animations in PowerPoint and How to Use Them?
Last updated on August 17th, 2024

In previous articles, we briefly explained the different types of PowerPoint Animations and how to animate text in PowerPoint. Among the various options available via the Animations tab in PowerPoint, Motion Paths are a set of animations that can make your presentations stand out by giving movement to slide objects.
What is a Motion Path Animation in PowerPoint?
As the name implies, Motion Path animations provide a path for the animated content to move along in PowerPoint. Each Motion Path animation gives the selected slide object a precise direction to animate them according to a set pattern. The animated content appears along the pre-defined path as the slides appear during a presentation.
Motion Path animations can be used to move slide content right, left, up, down, or towards a set pattern different from a linear path, such as an arc, turn, loop, etc.
Related: Download free Animated PowerPoint Templates with Instructions
Different Types of Motions Paths Animation in PowerPoint
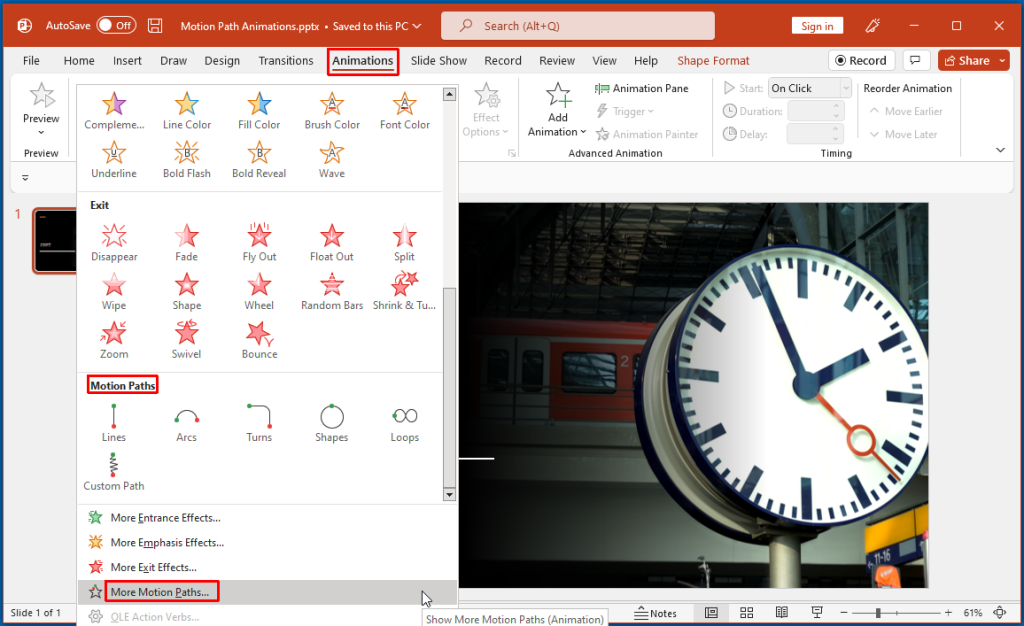
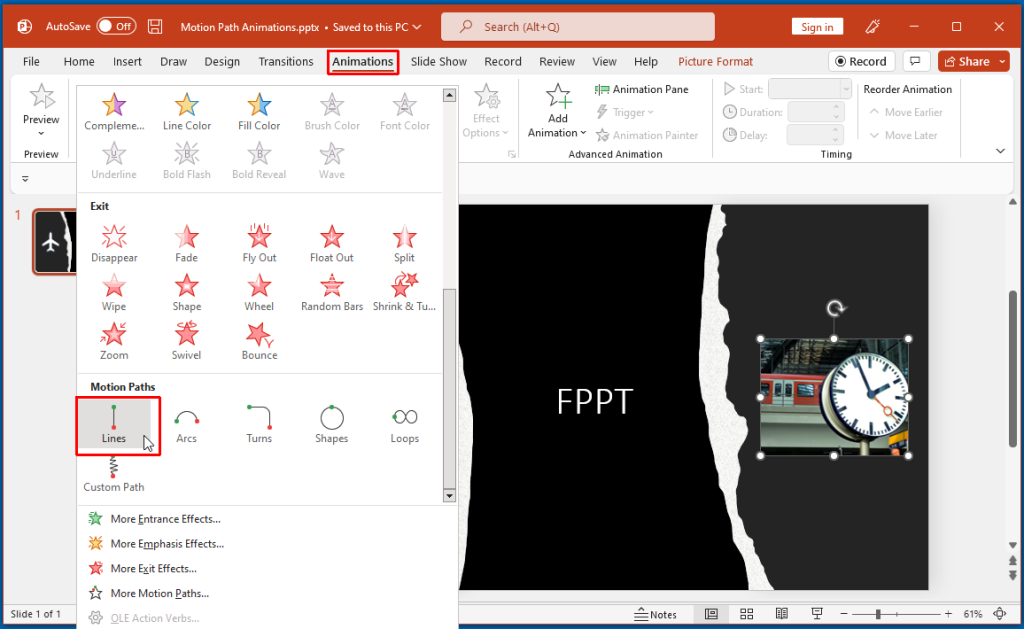
If you’re wondering which effect a presenter can use to add motion in PowerPoint using the Motion Path animations, select an object in your slide, head over to the Animations tab and open the Animation drop-down menu. As you scroll down the menu, you will see Motion Path animations at the bottom of the list. To see all Motion Paths available in PowerPoint, click on More Motion Paths.
Basic Motion Paths
Motion paths available in PowerPoint are divided into three broad categories. The first category provides basic animations such as a 4, 5, 6, and 8 point star, circle, diamond, football, hexagon, octagon, pentagon, trapezoid, parallelogram, right triangle, equal triangle, square, teardrop, crescent moon, and heart.

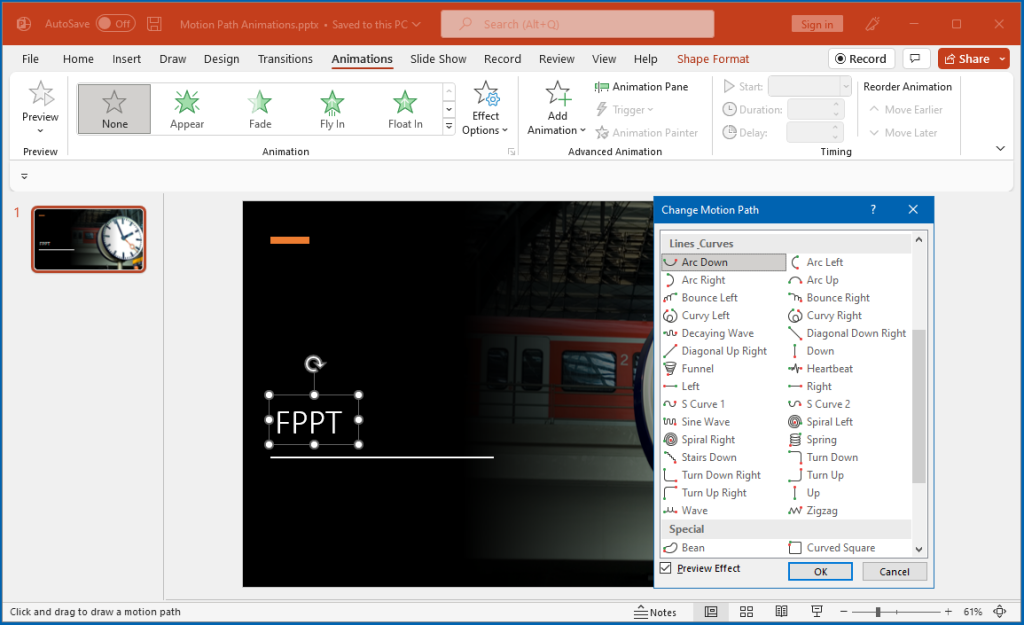
Lines and Curves Motion Paths
Other than basic Motion Paths, the most commonly used animations are lines and curves used by presenters to animate slide content. The available options to animate your slide objects along lines and curves include arc (up, down, right, and left), bounce (left and right), curvy (right and left), decaying wave, diagonal (down right and up right), down, heartbeat, funnel, left, right, S Curve 1, S Curve 2, sine wave, spiral (left and right), spring, stairs down, turn down, turn up, turn down right, turn up right, up, wave and zigzag.
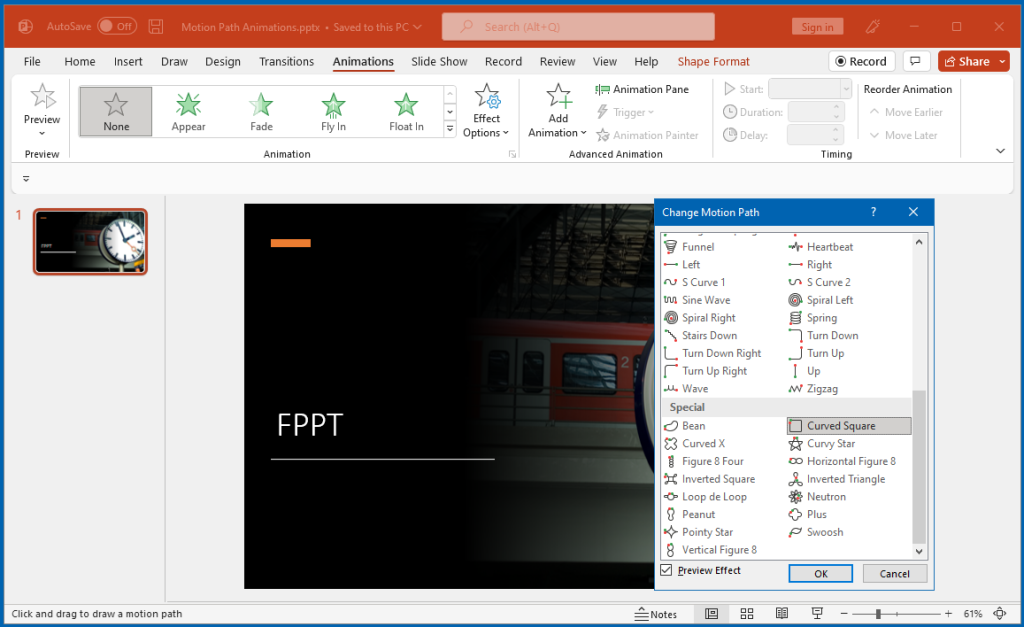
Special Motion Paths
Special Motion Path animations are the most complex of the three broad categories and come with some mind-bending effects. The available animations in this category include bran, curved square, curved x, curvy star, figure 8 four, horizontal figure 8, vertical figure 8, inverted square, inverted triangle, loop de loop, neutron, peanut, plus, pointy star, and swoosh.
Objects That Can Be Applied to a Motion Path Animation in PowerPoint
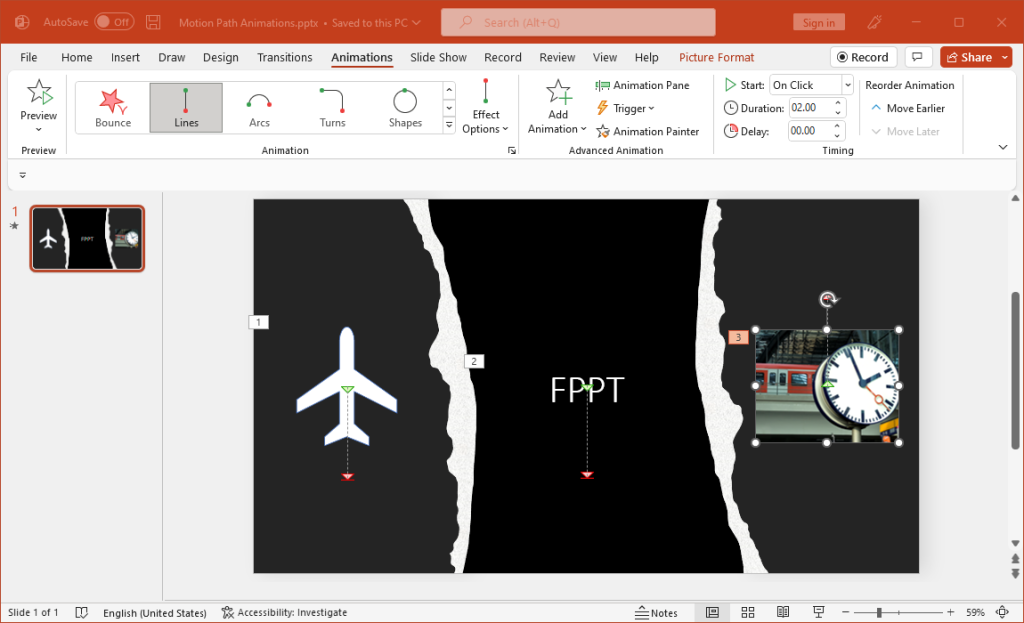
With Motion Path animations you can animate virtually any type of slide object, including text, shapes, icons, and images. This can help you generate animated illustrations in PowerPoint, as well as make your charts, tables, and pictures more interesting. You can also use a readymade Motion PowerPoint Template to add effects to static objects to give them movement.
Which Effect Can a Presenter Use to Add Motion Paths Animations in PowerPoint
Once you select a Motion Path, there are various effects that can be applied to the selected object. The available effects often include down, up, left, and right. The effects can be applied as one object, all at once, and by paragraph.
How to Make Motion Paths Animation in PowerPoint
In the section below, we will demonstrate how to add Motion Paths in PowerPoint by following a few easy steps. Learn how to use motion paths in PowerPoint with these simple steps below:
Step 1: Select a Motion Path Animation
To make a Motion Path animation in PowerPoint, select the slide object to animate and go to Animations -> Animation (menu), and select a Motion Path to apply.
Step 2: Determine Effects for the Selected Motion Path
The selected animation can be given a direction, effects, and locked.
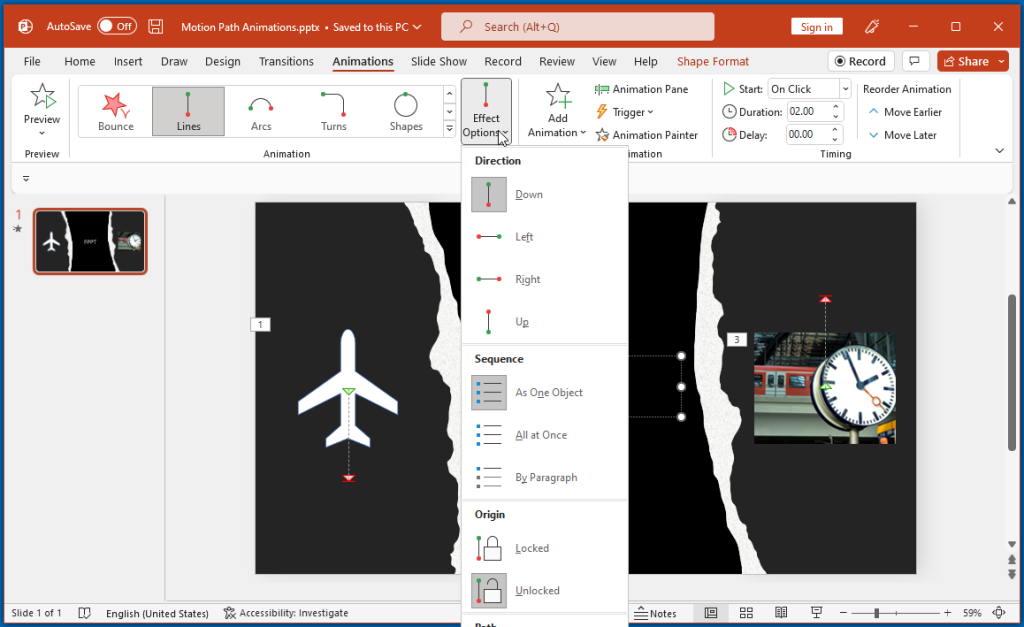
Effect Options: Select the effect to apply to your path via Effect Options from the Animations tab. A very common method to use Motion paths is to make an object move up, down, right, or left, such as a title or subtitle moving in a linear direction or an image or shape appearing on the screen along a specific path. You can determine whether you want to move objects together or one at a time.
Reverse Path Direction: This can be used to reverse the path by switching the points of the animation from start to end.
Locked and Unlocked Origin: An unlocked Motion Path moves when the object is moved in the slide. However, if you wish to keep the path intact, even if the object is no longer along the path itself, you can lock the origin.

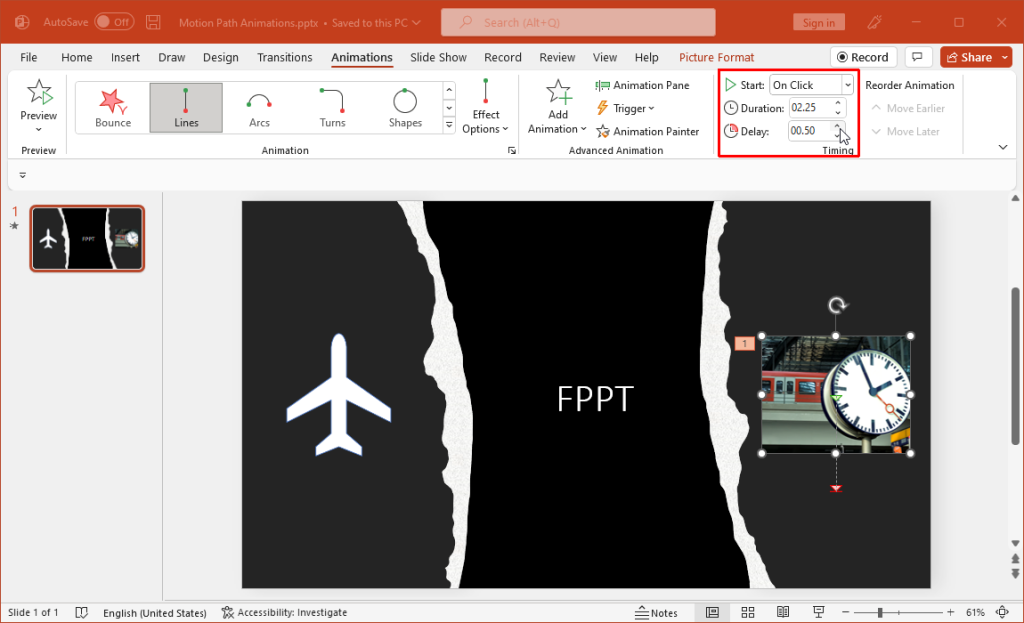
Step 3: Select the Time and Duration of the Motion Path
You can determine a trigger for your animation, such as on mouse click, with previous or after an animation, and select the time duration and delay for the Motion Path. This gives you control regarding when each animated object is triggered and how much time each animation uses.
Related: Create an Animated Countdown Timer in PowerPoint
Final Thoughts
Many times, transitions and animations in PowerPoint presentation slides are used with Motion Paths to make the slides more visually appealing. To create a mind-warping effect, you can also use Motion Path animations with 3D presentation slides. You can download free PowerPoint templates with 3D Animation from our archive and make use of pre-defined Motion Paths to make your content stand out. Something to consider when using Motion Paths is to ensure that they are used in moderation, as adding too many effects, especially some of the more complex animations, can make your presentation end up with a bunch of distracting effects that might end up serving no real purpose.