How to Transpose a Table in PowerPoint
If you need to transpose a table in PowerPoint then this article can be helpful. Unfortunately PowerPoint do not have an option to transpose a matrix or table but we can rely on Excel for this task. Microsoft Excel let you paste the table using the transpose format, which is very helpful if you need to switch the rows and columns from any table. For example, if you are preparing a business balance sheet or Profit & Loss budget using a template and want to switch the rows with the columns then you can use transpose.
How you can transpose a table in a PowerPoint presentation? (Step by Step)
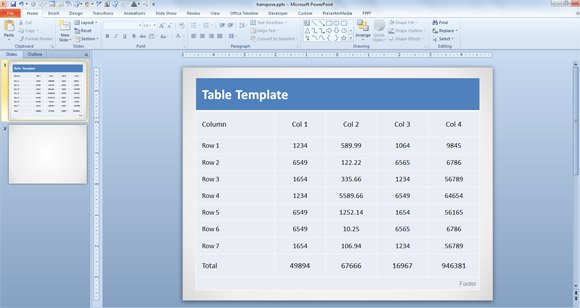
1. Open the PPT presentation and copy the table to the clipboard.
2. Then, go to Microsoft Excel and paste the table in a new worksheet. Our table pasted in Excel will look as follows:

Related articles:
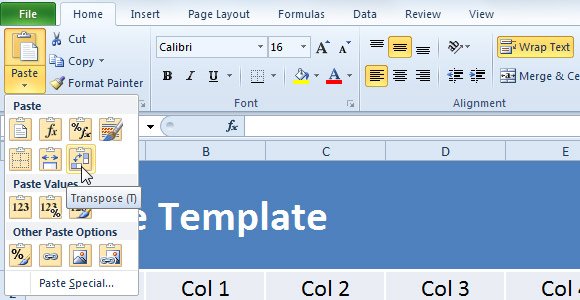
3. Now, the trick here is to copy the table again in Excel (to the clipboard).
4. Go to a new cell outside your current table and look for the Paste button but don’t click it, click the popup menu below the button. Look for the Transpose option.
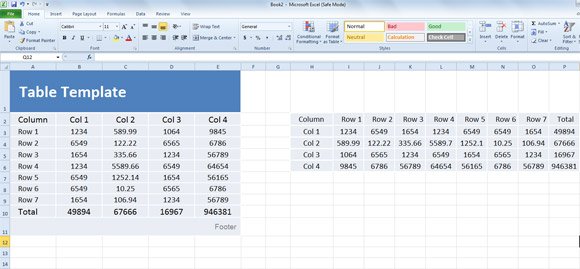
As you can see in the figure below, our new table is transposed.
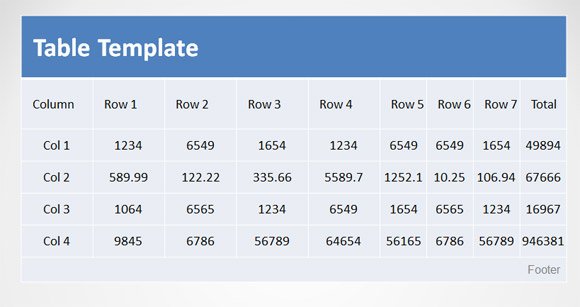
5. Now, copy the values from the new table and go to PowerPoint. Put the cursor in the top left cell from your existing table (or create a new table), and then click Paste.
The new table will contain the transposed values copied from Excel. Now you can remove all the remaining rows and you will get a transposed table in PowerPoint.
If you need to download a nice table design for PowerPoint then you can get one from SlideModel.com