How to Add New Shapes to Existing SmartArt Graphics
SmartArt graphics are widely used these days in Microsoft Office, particularly in PowerPoint, as a tool to visualize information. With SmartArt graphics, you can create attractive designs that also convey a story or a message. Therefore, your documents, in this case, your slideshows, will be tidier and more concise. Learn all about how to add new shapes to existing SmartArt Graphics from the tutorial below.
Add New Shapes in SmartArt Graphics
PowerPoint, like other Microsoft Office programs, has built-in SmartArt graphics for lists, pictures, descriptions, and many others. So, instead of using long text descriptions that can easily bore your audience, you can use colorful shapes and pictures as well as just short text that is more memorable. However, with these built-in SmartArt, there’s only a given number of shapes where you can put your information, such as text or pictures. Don’t worry, however, because it is actually possible to add more shapes to your SmartArt graphics and even format your shapes.
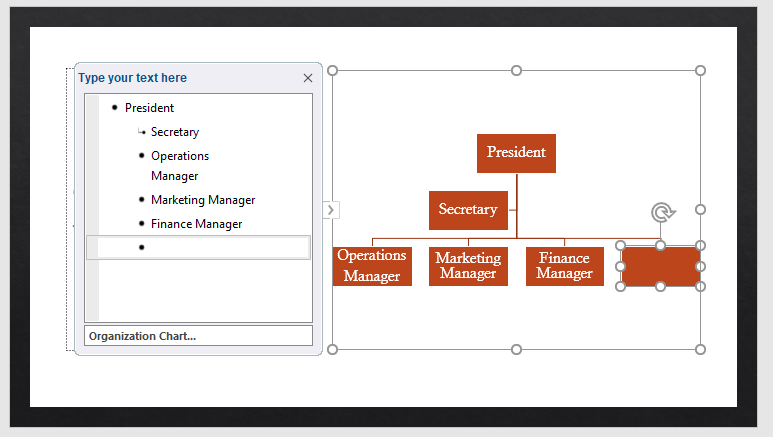
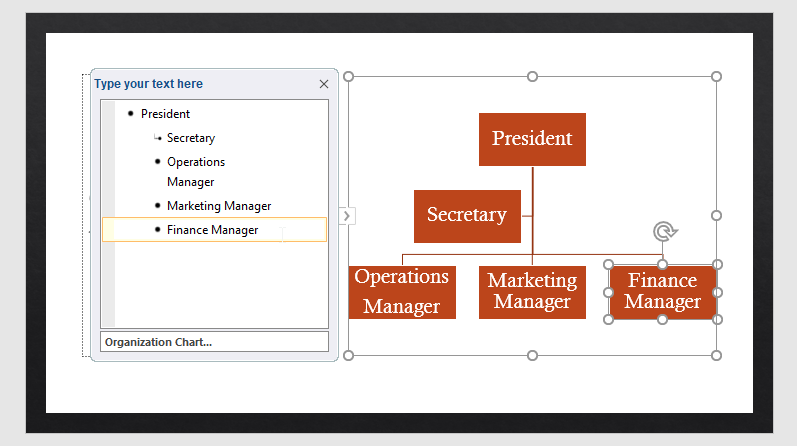
You can create a SmartArt graphic for your existing text and, if you want to add more information, you can add new shapes. You can do this in two ways. One is to add a new shape into the SmartArt itself. Another is through the Text Pane. Depending on the type of SmartArt you chose, you can create many customizations on it. To add new shapes to an existing SmartArt graphics, you first have to open the presentation where you want to add a new shape to your SmartArt. Then, select the SmartArt. In our example, we are using the Organizational Chart.
Add New Shapes in Organizational Charts
We all know that organizations often change. More people can be added, and titles and positions can change. So, if you’re using a SmartArt like this, you can add new shapes or edit the existing ones by first selecting the SmartArt graphic. Then, two contextual tabs will appear in the Ribbon: Design and Format.

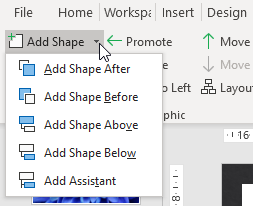
Choose the Design tab, then click on the Add Shape button to bring up a drop-down gallery of other options.
Alternatively, you can right-click the selected SmartArt of shape to bring up the contextual menu.
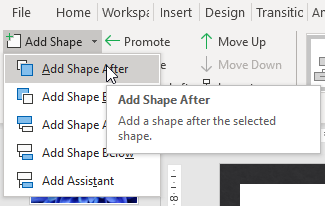
Then, choose the Add Shape option. As you may notice, the options here are more or less the same as the options under the Design tab. If you want to add a shape at the same level as the shape you selected in the SmartArt, you can click on Add Shape After. If you want to add a shape at the same level as the selected shape, but your new shape should come before it, click on Add Shape Before.
If you want your new shape to appear one level above the selected shape, click on Add Shape Above. At the bottom, click on Add Shape Below. You may also select Add Assistant. This feature is available in the organizational chart layout, wherein you can add a shape lower than the selected shape, but will not be part of the other shapes below.