How to Make a Family Tree in PowerPoint using Shapes

Let’s see how to create a simple family tree PowerPoint template using shapes in PowerPoint. In order to design a family tree we will add elements to the tree. The ancestors will be the leaves of the tree, while the Me node will be the root. We can position the tree in vertical mode or horizontal family tree mode in case we need it.
First, we need to insert some square or rectangular shapes into the slide.

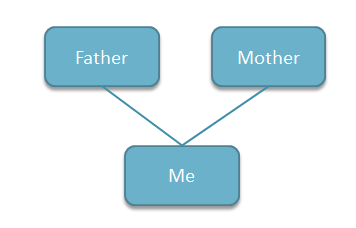
We can start adding the root, that will correspond to “Me”. Then we will add two more shapes (we can just copy the current one so we can keep the same styling), press CTRL while moving the shape and this will copy the shape again.
Once we have at least two rectangle shapes we can add some connectors. Use the line connector to connect Me to Father and Me to Mother.
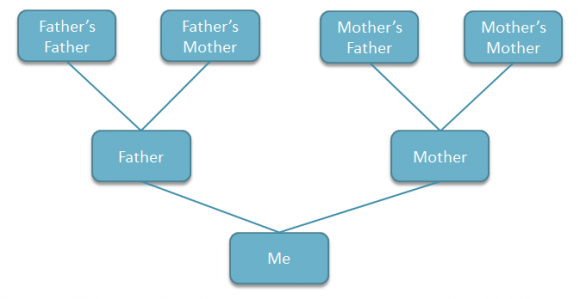
Then we need to iterate this multiple times until getting many levels. This will depend on your historical tree family and how many descendants and ancestors you have.
During this step you can adjust the root and the connectors just to make it look ok. Also you can add your father’s father, father’s mother, mother’s father and mother’s mother that will be your grandfathers and grandmothers. Add new connectors to the tree until you reach the end.
Instead of rectangles you can use man and woman figures or shapes. This can be easy if you download free shapes and vectors from free image stock. Alternatively you can download free Family Tree PowerPoint templates to embed your family tree diagrams.
Finally we got a simple Family Tree template that we can use to create our own family tree or a family history chart for someone else or to make printable family trees in PowerPoint.