How to Add a Header to a Table in PowerPoint
Previously, we showed you how to customize the table design in PowerPoint so you can change the background color and borders. In this article, we will show you how to add a header in PowerPoint table. You can specify a table header in PowerPoint by checking the check box Header in the Design menu but below you can learn how to merge cells to be used for header or footer in a table design.
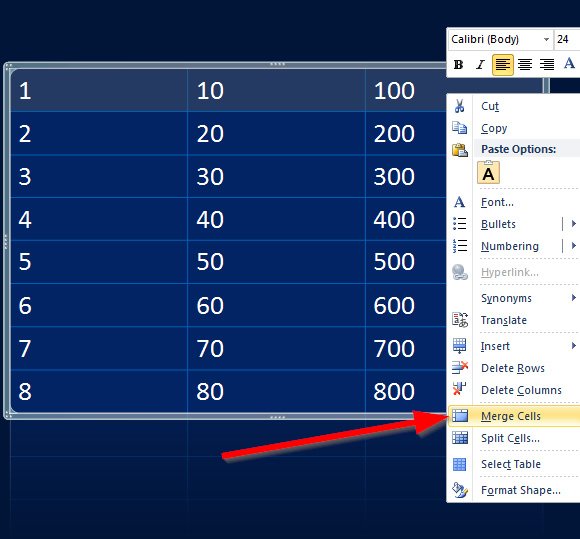
To insert a header to a table in PowerPoint, select the cells that you want to use for the header and then right click to show the popup menu. Click Merge Cells. You can learn how to insert a table in PowerPoint, here.

Then you can format the header using a different font or aligning the text to the center, like in the screenshot.
You can add a footer to the same table using a similar approach. Instead of the cells for the header, select the cells on the footer and then right click to select Merge Cells.
Then you can customize the last row.
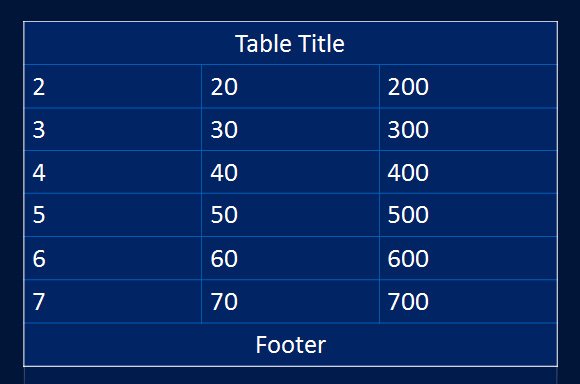
This way, you can easily customize the footer or header. Alternatively, notice that some styles in the Quick Style menu can easily be customized in a similar way, in fact you can choose the header, footer, first column style, last column, banded column or total row style.

You can learn more about how to apply styles to tables in PowerPoint or how to animate table in PowerPoint.