How to Draw a 3D Cone in PowerPoint
Last updated on July 1st, 2024
Cones are widely used to represent business diagrams and as an alternative to pyramid diagrams. In PowerPoint we can easily create 3D objects using PowerPoint shapes and effects. Here, we will guide you on making a simple 3D Cone in PowerPoint with shadow effect and gradient fill that can represent any business model or diagram, for example, Maslow’s Pyramid of Needs.
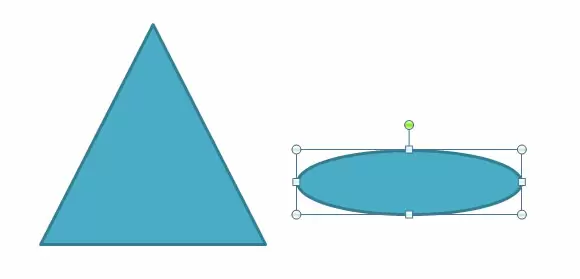
Step 1 – Add an Oval and Triangle Shape
Let’s start creating the base of the cone using an oval shape and then adding a triangle to the slide. We will make these two objects fit together and then use the Union tool in PowerPoint to combine the two shapes into one single shape.
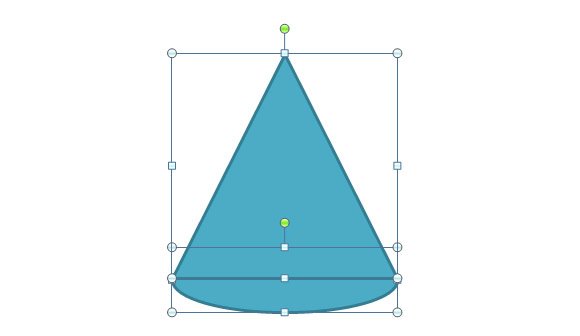
Step 2 – Combine Shapes and Create a Simple Cone
Having the two objects selected, we will combine the shapes by using Union option. If you want to enable Union option in PowerPoint 2010 then please read our tutorial.
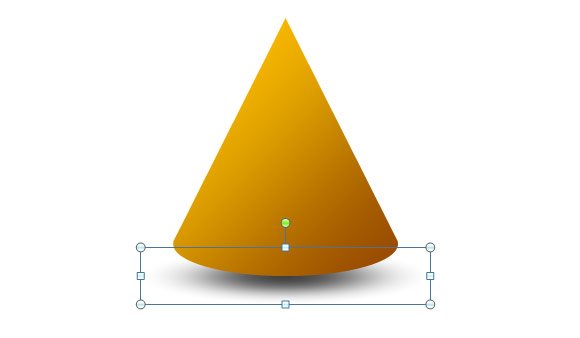
Step 3 – Add Background Gradient Fill
Now we have a nice 3D Cone design and we can edit the properties. We are going to change the fill option and choose a Gradient fill.
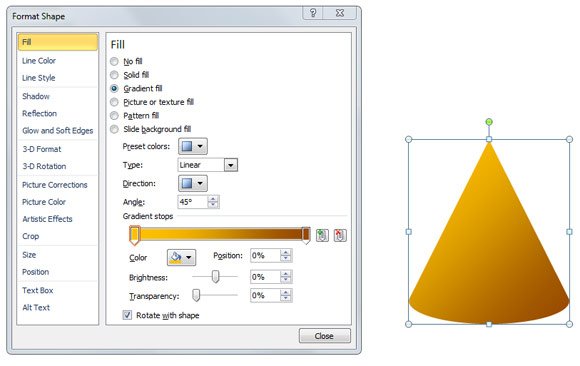
The figure above shows the gradient fill style we chose for this cone.
Step 4 – Add Drop Shadow
Now it is time to add the drop shadow effect. For this purpose we created a simple shadow shape instead of using the built-in shadow option in PowerPoint. The reason we used our own shadow effect is to make it look more realistic.
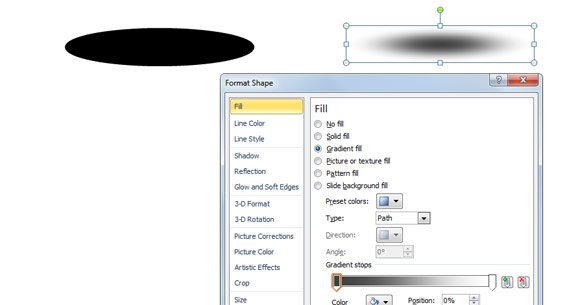
To create the shadow you can start drawing an oval and then choose the Gradient Fill and select black in one of the edges and white in the other edge. The trick here is to add 100% transparency to the white side.
Step 5 – Prepare the 3D Cone Diagram for PowerPoint with realistic shadow
Locate the shadow below the 3D Cone and send it backward.
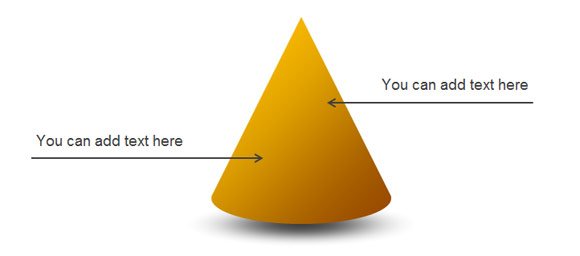
Step 6 – Add Text Boxes and Arrows
Finally you can add some text boxes and arrows or customize the 3D cone diagram in PowerPoint to fit your own presentation needs.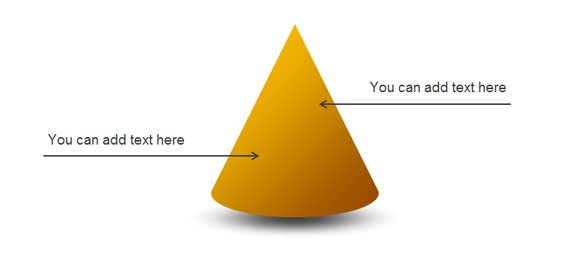
Here is an example showing the result we have achieved after following the steps. An older article also explains how to achieve this 3D cone using PowerPoint shapes. If you need to download free pyramids and cones for PowerPoint you can check our free PowerPoint templates and backgrounds or you can download professional PowerPoint templates from SlideModel.
Very good designs
Hi Rogger. Thank you. You are welcome to submit new ideas.