3D Bridge diagram PowerPoint using shapes
Bridge diagrams can be very helpful on business and meeting presentations to describe situations where you need to move from one point to a future point traversing some risks.
Bridge illustrations are widely used in business presentations and sometimes we need to design charts and diagrams where a bridge image or illustration should be present. For example, if we need to show our client about what to expect from a current start point and what to expect if we move along the bridge to and end point that can be described with a bridge diagram. Here we will show how to design a 3D shape diagram in PowerPoint that you can use for your business presentations and other designs in PowerPoint.
The same situation can also be described with big arrows and lines representing the starting and end point.
1. Design 2D bridge by combining shapes
Let’s start drawing a shape like the example below. Yes, we all know that this shape is not a bridge, but we will apply some shape operations later.
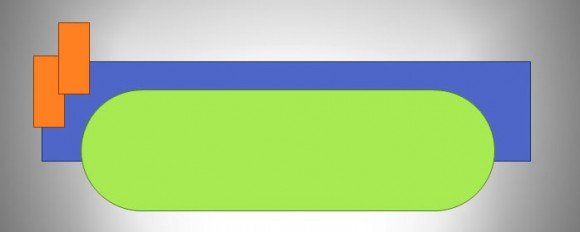
- The orange area will be used as steps for the bridge. We will copy these shapes to the right, too.
- The green area will be the bottom part of the bridge.
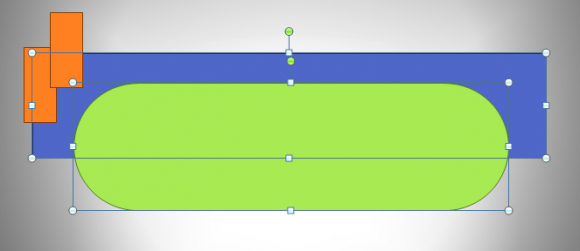
Now, we can apply some shape and group operations to subtract the bottom part of the bridge.
Select the blue area and immediately after select the green area just holding the Shift key.
2. Design the bridge steps
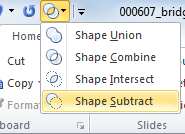
Then apply the subtract button.
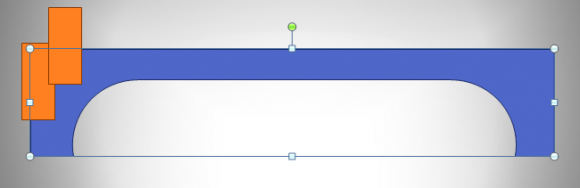
You should get something like this:
Now, the tricky part. Copy the two left orange shapes to the right. Apply a group so you can combine the two shapes and finally rotate it horizontally. This will help us to replicate the steps for the right side of the bridge.
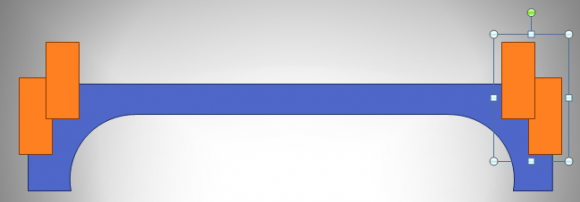
The grouping operation for the two right shapes is only needed to rotate it horizontally. Obviously you can just replicate the same style by copying and moving the individual shapes.
Now, please ungroup the right orange shapes so we can subtract the steps.
Now we need to select the blue area again and then select the orange shapes. Apply the Subtract operation again and you should get this:
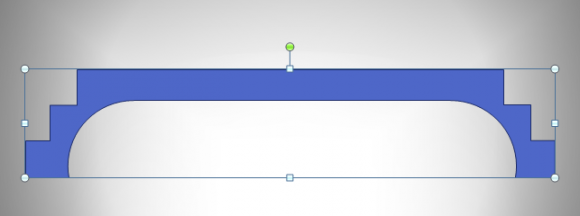
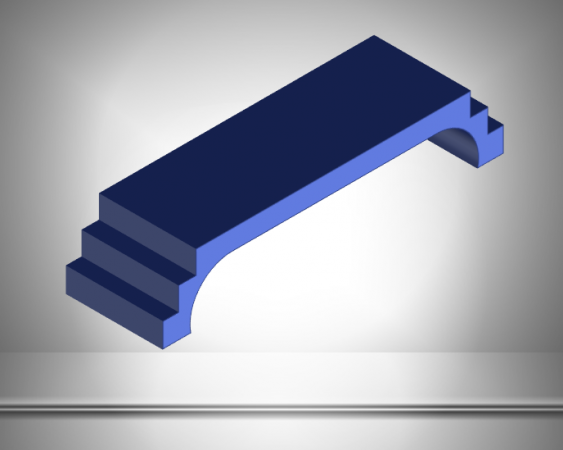
Ok, we are almost ready. Now we got a simple bridge diagram or shape with steps.
But we will go a step further and apply some nice 3D effects to this free 3D diagram.
3. Design 3D bridge in PowerPoint
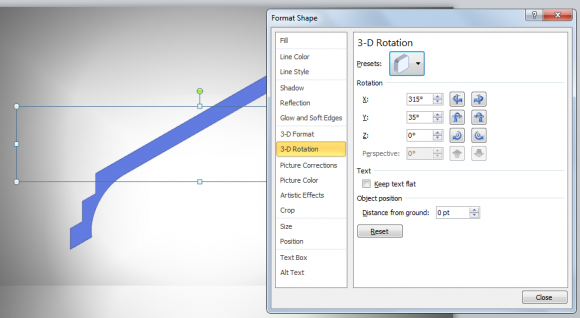
Go to Format Shape and add 3D Rotation like in this picture.
Then go to 3D Format and add 150 pt for Depth.
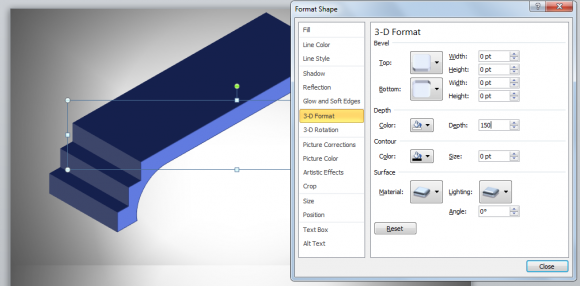
And finally we got our 3D bridge template for PowerPoint.
If you liked this free tutorial we encourage you to visit our website with tons of free PowerPoint templates and backgrounds for your presentations, and don’t forget to like the article.