Office Timeline for PowerPoint
As a PowerPoint user, Office Timeline is a free add-in that may be very helpful for you. It’s designed to help you create professional looking project timelines with just a few clicks. The easy to use wizard only asks for data for each stage of the project, such as start date, end date, description, etc., and the program instantly creates a timeline slide within your current presentation. There are lots of templates and designs to choose from.
You can edit and customize a timeline at any time, using the Office Timeline tab that appears on the PowerPoint ribbon once you’ve installed the add-on. There’s also a useful 3-minute video that shows you a demo of all the program’s major features.
Quick Tutorial on How to Use Office Timeline
Once you have installed Office Timeline, it automatically adds an extra tab to Microsoft PowerPoint Ribbon with a number of different useful tools for timeline creation and editing. To create a new timeline, click New button in the Office Timeline ribbon.

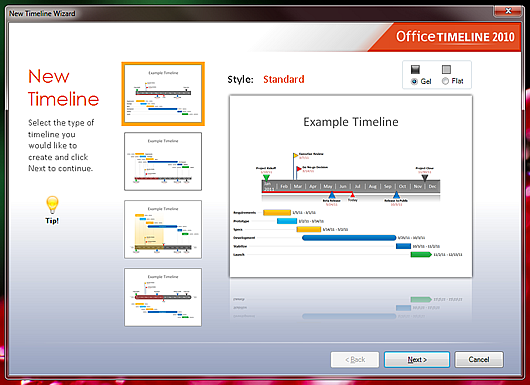
1) This will start a wizard which will guide you through a very simple process. In the first step, you will choose the timeline style and pick the Gel or Flat look and click Next. You can change this style later after you have created the timeline.
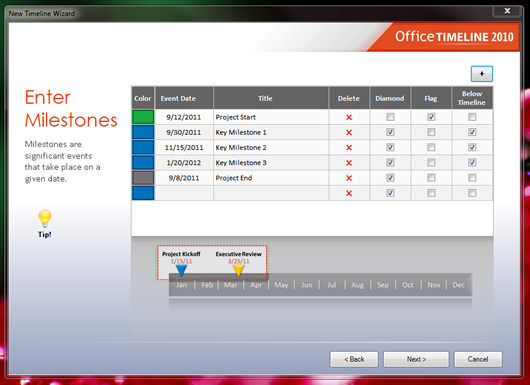
2) On the Enter Milestones page, you can enter milestones of your project with a custom color, event date, and title for each milestone. You can choose to make each milestone a diamond shape or a flag shape and also decide if you want the milestone to be placed above or below the timeline. Again, you can change any of these options later. Once the milestones are added click Next to continue and get your free timeline.
3) This is the final step. In this step, enter the intervals (phases) for an activity or task. Like milestones, you can select different colors to easily distinguish each phase on timeline. For each phase, a start and end date can be added to better mark the start and completion date of each phase. The Shapes option allows you to select different shapes for each interval. Once done, click Finish to create the timeline.

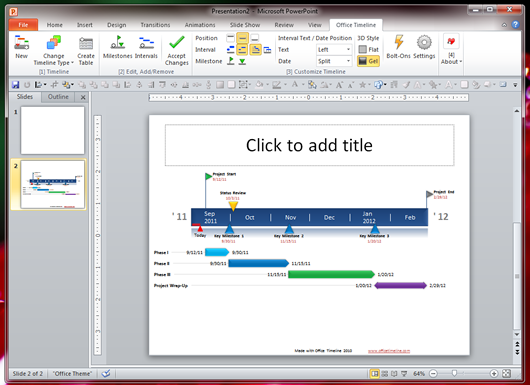
And voila! The created timeline can now be further edited using the options from the Office Timeline ribbon. For example, you can change timeline type, change the color of the main timeband, add/remove decorations from the timeline such as the today marker, elapsed time, add more milestones and intervals and so on.
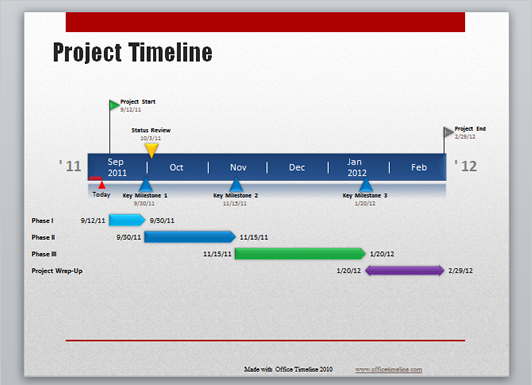
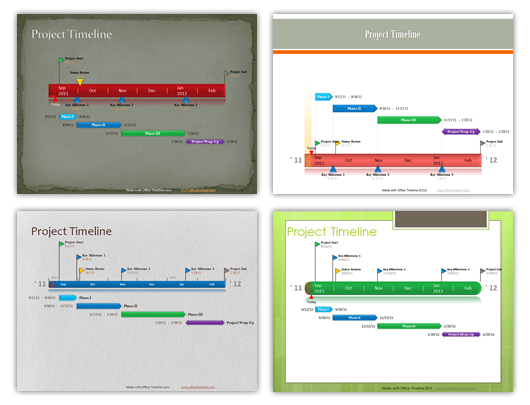
Simply applying a PowerPoint presentation template can completely transform the look and feel of the timeline. See screenshots below where different templates were used and the Change Timeline Type button was used to switch timeline styles.
As you can see, this powerful timeline creator can help to deliver stunning and awesome timelines for your business presentations or projects. OfficeTimeline comes in two versions: Free OfficeTimeline or OfficeTimeline Plus edition.
You can see the following video about Office Timeline.