How To Insert Automatically Updating Images in Word
In this busy, fast-paced world, it’s always a good idea to automate whatever you can, so you can focus on bigger things. Whether it’s in your business, in school, in your community or organization, working efficiently and making the most of your time is important. Such as automatically updating images in Word!
With Microsoft Word documents being around for the longest time, it being the most used word processing software the world over, automation may be far from users’ minds. Word has always been packed full with features that make working on documents, written projects and reports so much easier and with great results. However, with technology changing as fast as you save your documents, there’s a lot to keep up with.
You can insert images in Word and have them updated automatically. This feature is important in ensuring that you have the latest information on hand. This Word automation feature is convenient for anyone who needs to keep their Word files updated for regular reports, especially when you’re dealing with frequently changing information.
Automatically Update Inserted Images in Word
To keep your images updated automatically in Word, your image files must be hosted online, which is fairly easy these days due to many cloud storage services available for everyone. Microsoft Word even supports Dropbox, which allows all users to have free cloud storage services for their files, which can then be linked to Word. Other cloud storage services can also be used.
Step 1: For this image insert feature to work, you need to first upload the images you need for your documents in the cloud to host your files. For this example, we will use Dropbox, which is ideal because it is seamlessly linked with Word and other Microsoft applications with a simple workaround. You only have to change the link with “www.dropbox.com” with “dl.dropboxusercontent.com’ so your images are directly linked to your specific Dropbox file.
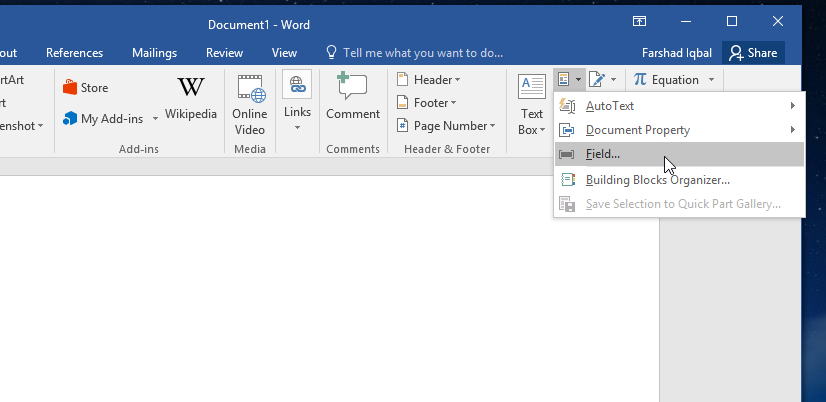
Step 2: From the cloud, you have to copy the URL of the image and insert this into Word. This allows you to keep your link intact so whenever you’re online, your images are easily updated and reflected in your Word document. To insert your image into any Word document, go to the Insert tab on the Ribbon and then open the Quick Parts function. A drop-down will appear, where you will select Field.
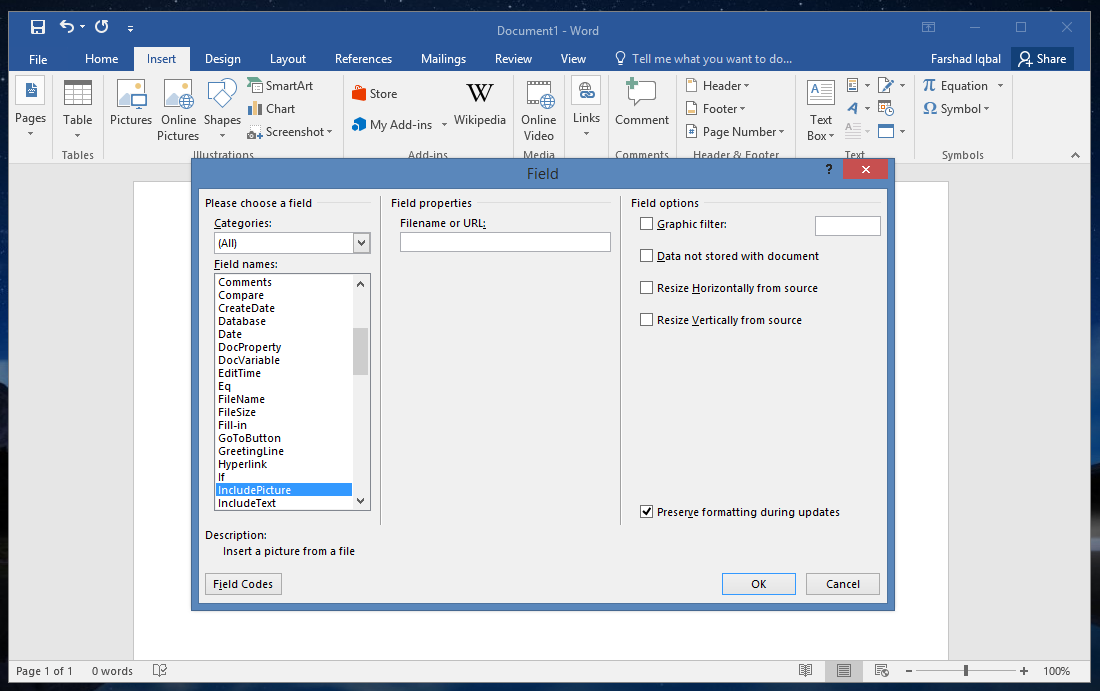
Step 3: Upon clicking Field, a new window populates with all the things you can insert. Select the Include Picture field. Then, under Properties, paste the direct link to the image you want to insert into your Word document. Under the Field Options column on the right, tick the check boxes with options that say ‘Date not stored with document’ and the ‘Resize Horizontally from source’ and ‘Resize Vertically from source’. Then, hit ‘OK to insert your image. Doing this will make sure that the images will be resized accordingly as you update them. It also tells word to fetch the image from the link so that it’s always updated to whatever image you assign the link to.
Now, from time to time, you may need to change the image to update your files. To do this, you have to change the image simply in Dropbox or in any cloud service that you use to host your images. This way, the next time you open your Word document, the latest image that points to the URL will also be automatically updated. Just make sure you’re online whenever you do this.