What is a PowerPoint Shape?
Last updated on September 7th, 2023
Shapes are vector graphics in PowerPoint that can be used to add interest to any presentation, emphasize a point or to create custom graphics of your choice. PowerPoint shapes can be formatted with colors, 3D effects, shadows.
Furthermore, individual shapes can be merged into other complex shapes. But shapes used in PowerPoint are more than just circles, rectangles, squares or pentagons, since you can make use of these shapes to create simple to complex illustrations and slide designs. Let’s take a look at what is a PowerPoint shape and how can you make use of shapes for making your presentations more interesting.
Main Advantages of using Shapes to Design your PowerPoint Presentations
One of the main benefits of using shapes in PowerPoint is that they can be resized without losing the image quality. Shapes can be really large or very small, and offer a lot of flexibility while working with your PowerPoint presentation, as shapes can be customized to fit your presentation requirements. Also, shapes help to make your presentations unique and memorable. PowerPoint has a built-in collection of geometric shapes that can be used in your slides for creating anything from basic diagrams to flowcharts, illustrations, and complex slide designs.
Shapes that are created in PowerPoint are like vector graphics, like those you can create in a vector software, such as Adobe Illustrator or Inkscape.
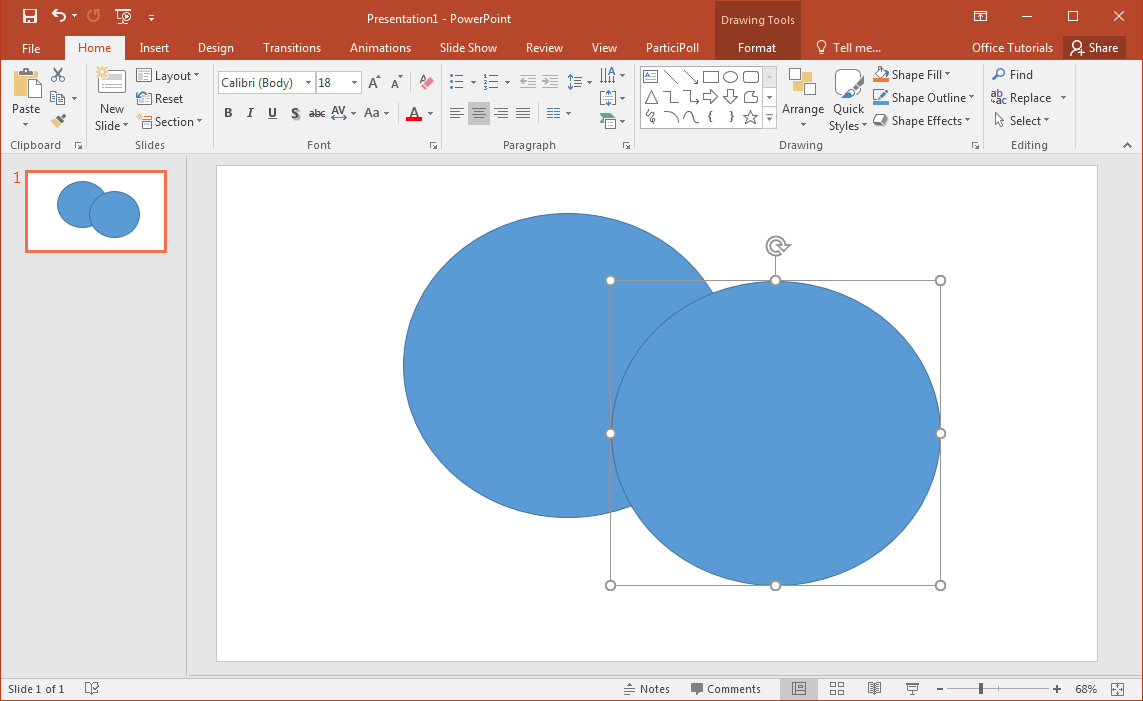
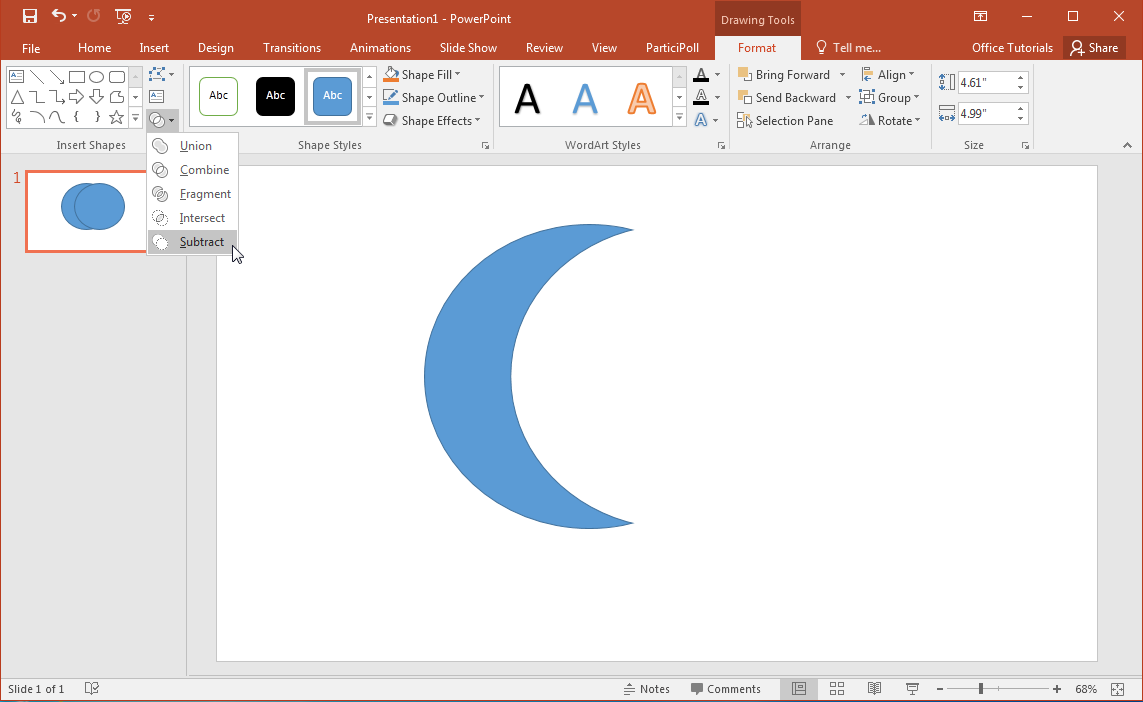
Shapes are very useful to create all kinds of graphics in PowerPoint, from simple figures to complex business diagrams, timelines or any other visual representation for business presentations. For example, in the example below we used two circles to create a crescent by subtracting one circle from the other using the Subtract option from the Merge Shapes menu. By using shapes, you can create eye-catching infographics and visual designs in PowerPoint.
Combine Individual Shapes to Create Custom Shapes
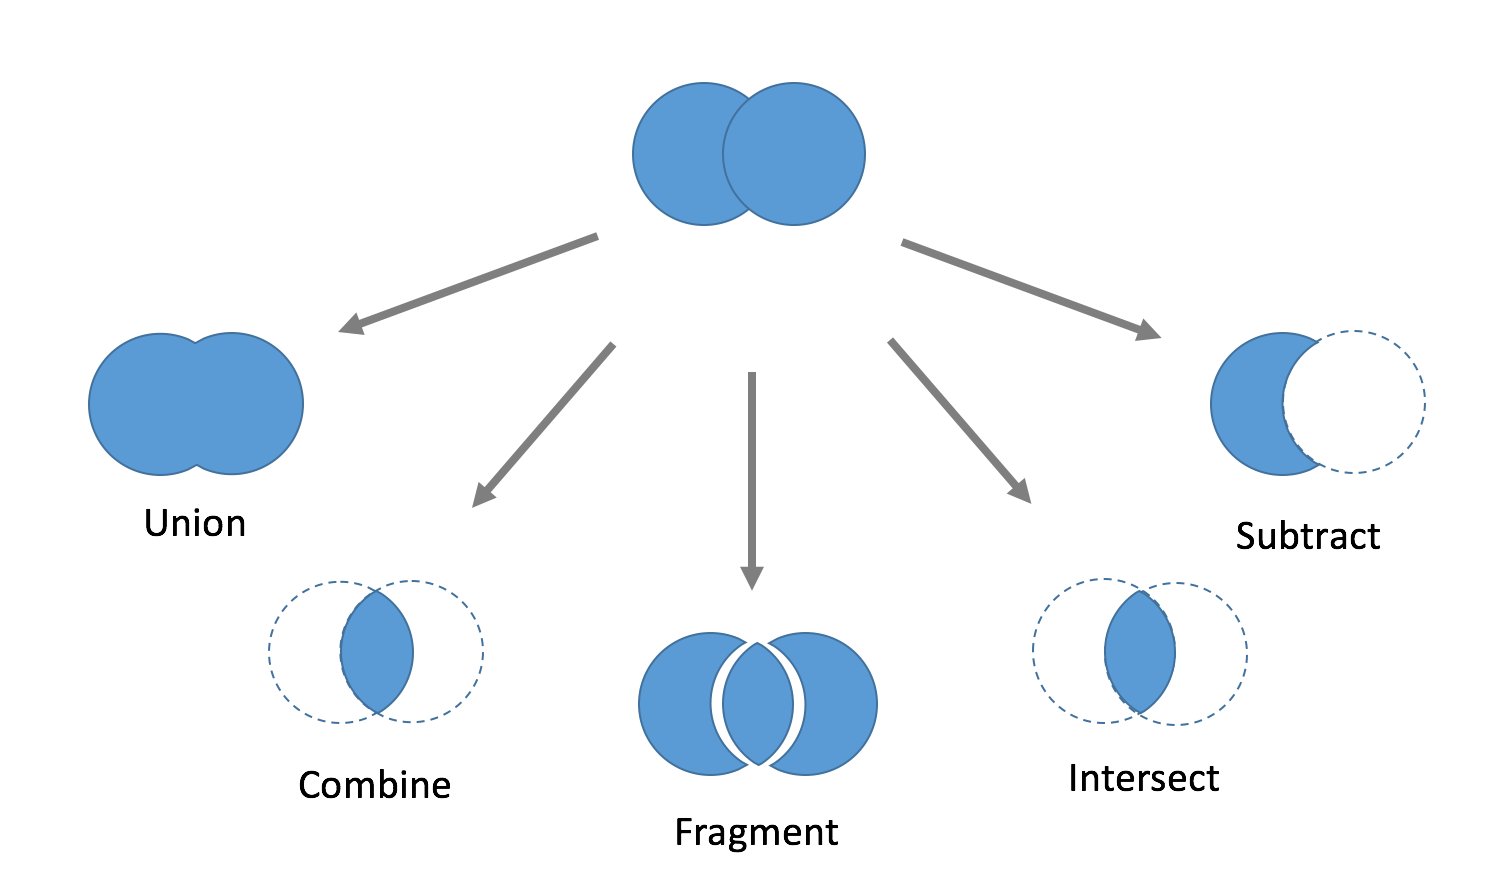
The following illustration shows the different set of options that are available via the Merge Shapes menu in PowerPoint. These options include; Union, Combine, Fragment, Intersect and Subtract operations. These operations add endless opportunities for designing and customizing your PowerPoint presentations.
Combining basic shapes in PowerPoint can let you create custom shapes or more complex ones. It is possible to use the shape group feature in PowerPoint to merge shapes.
Here is a quick demonstration on how the Combine tools work.
How to Merge Shapes in PowerPoint using Combine Shapes Tool?
Using the Combine tool in PowerPoint you can make custom graphics from scratch. The main benefit of this method to create graphics is that you can directly create editable vector shapes in PowerPoint. The process involves the following steps:
- Insert basic shapes into the PowerPoint slide.
- Use Merge Shapes tool to create tailor-made complex shapes.
- Format the shapes with 3D effects, custom colors or shadows for the finishing touch.
This post at Microsoft’s website introduces you to the process of making custom graphics in PowerPoint.

Un-merging Shapes in PowerPoint
Is un-merge possible? Merging the shapes using any of the operation tools available in PowerPoint will cause the original shape to be lost. However, in case you need to recover your original shape later (for instance to accomplish an un-merge shape action) we’d recommend to use any of the techniques below:
Option 1 – Save a copy of the original shape (duplicate the shape) before applying any merge operation. If you don’t want the original shape to be visible, you can use the Selection Pane in PowerPoint to hide any particular shape.
Option 2 – Save a copy of the original shape and move it to the last slide. You can use the last slide (and eventually hide it so it is not played during the slide show) with all the original shapes or assets used in your presentation.
Option 3 – Alternatively, a copy of the shape can be saved in the same slide where the merged shape is used but instead of hiding it you can move it out of the slide so it won’t be visible when playing the slideshow.
If you finish the presentation and do not need the original shapes any more, then you can go through these graphics and delete them.
Option 4 – You can use the Power User add-in to instantly unmerge shapes in PowerPoint at the click of a button. For more details, see the video below.
Splitting and Joining Shapes
If you intend to split an existing shape, you might have to use a line to give the illusion of a split shape or use the crop tool. However, splitting and joining shapes can be done more neatly if you group them together. Below is an explanation of grouping and merging shapes and what makes them different in functionality.
Difference Between Grouping Shapes vs. Merging Shapes
While shapes can be merged using any of the pre-defined set of operations seen before, Group is a different functionality. One of the main advantage about using Group Vs Merge is that grouped shapes can later be ungrouped.
When you merge shapes, a new object is merged into a single slide while the original shapes are lost and cannot be un-merged unless we use any of the workarounds described above. However, grouping shapes allow to logically group them together and later these groups can be ungrouped. Group feature is especially useful in some situations, such as when manipulating diagrams or shape elements. With Group, a single ‘grouped’ object in PowerPoint can be easily moved around the slide.
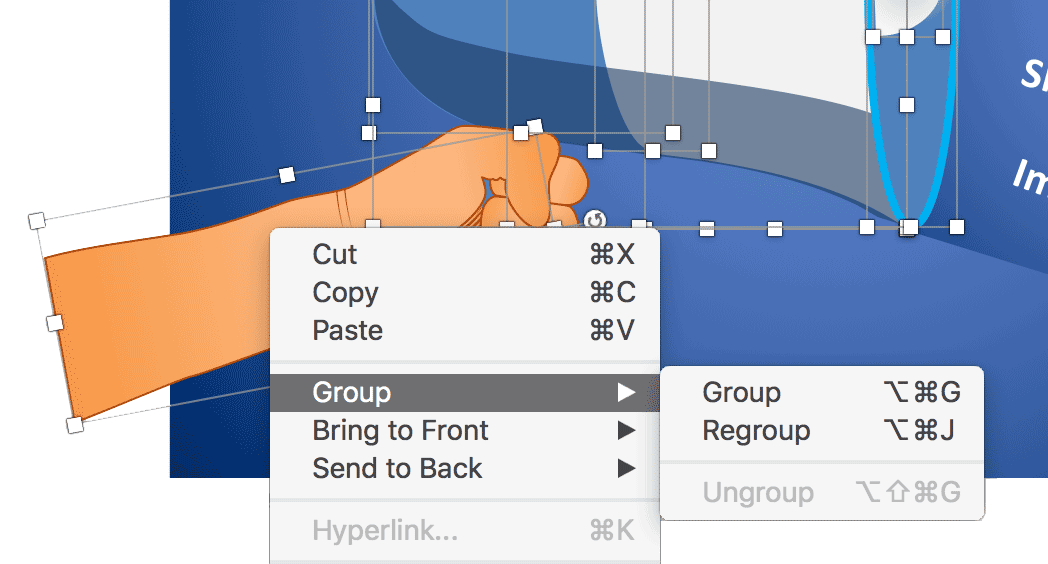
If you need to group objects together, select the shape objects to group (you can hold the Shift key while selecting the objects in the PowerPoint slide or by using the Selection Pane). Once the objects are selected, hit CTRL+G on your keyboard. You can also right click and then select group.
Organizing Shapes in PowerPoint
Selection Pane is a great tool in PowerPoint (available in Microsoft PowerPoint for Mac and PC) that allows the presenter to organize the shapes easily. It is also possible to rename shapes. This is especially recommended when dealing with too many shapes and complex diagrams.
Assigning proper names to the individual shapes or groups, it is easier to manipulate the slide, change the order of shapes and customize the graphics or change the shape properties in the future. Also, the Selection Pane allows to select the shapes directly from the pane (it is also possible to select more than one shape while holding the CTRL key).

Shapes Make PowerPoint More Powerful!
With PowerPoint shapes, you can make much more than just attractive and complex presentation graphics. For instance, it can be used to create logos or even icons. Moreover, you simply cannot make flowcharts in PowerPoint with shapes. For this purpose you get the complete set of shapes necessary for making flowcharts. For more details, see our ultimate guide to making flowcharts.
Often, readymade PowerPoint templates are actually designed using nothing more than cleverly combined PowerPoint shapes, allowing presenters to make use of ready to use editable diagrams. Hence, shapes, despite being one of the most underrated feature of PowerPoint are not only important for making professional looking slide decks but are also one of the most important features of PowerPoint.
And now that you know all about what is a PowerPoint shapes and how can it be manipulated, you can begin making your own slide designs and illustrations to add some visual appeal to your PowerPoint presentations.