How to Record Narration for PowerPoint
Traditional presentations often have a speaker in front of an audience, usually on a stage or podium, with the slideshow behind them. With the right kind of slideshow and an effective speaker, this setup can be compelling and memorable. However, with various technologies, applications, and devices we have today, it’s also possible to deliver equally moving slideshows the non-traditional way. Below is a tutorial which shows you how to record narration for PowerPoint.
When we say non-traditional, this typically involves web-based presentations or a self-running slideshow, where a speaker doesn’t really have to be physically present in front of an audience. Furthermore, the audience doesn’t also have to be all together in a room, but instead be anywhere in the room, accessing your presentation through different platforms, devices, and even at different times. With this, however, comes certain challenges that you, as a presenter, must face.
Include Narration in Your Presentation
If you want to create a web-based presentation or a self-running slideshow while still interacting with the audience or ensuring that you deliver your message specifically the way you want them to receive it, then you can do so by narration. This means you don’t always have to be talking to your audience each time someone plays your presentation, because you can record narration for PowerPoint presentations.
You can record your presentations and background narration with ease using a sound card, microphone, speakers, and even a webcam if you want your audience to see you as you speak. You can also record your PowerPoint slideshow, narrations, slide timings, and ink gestures. All these can be done right within PowerPoint, and you can save this as a video file for easy playback to any audience.
How to Record Your Narration for PowerPoint
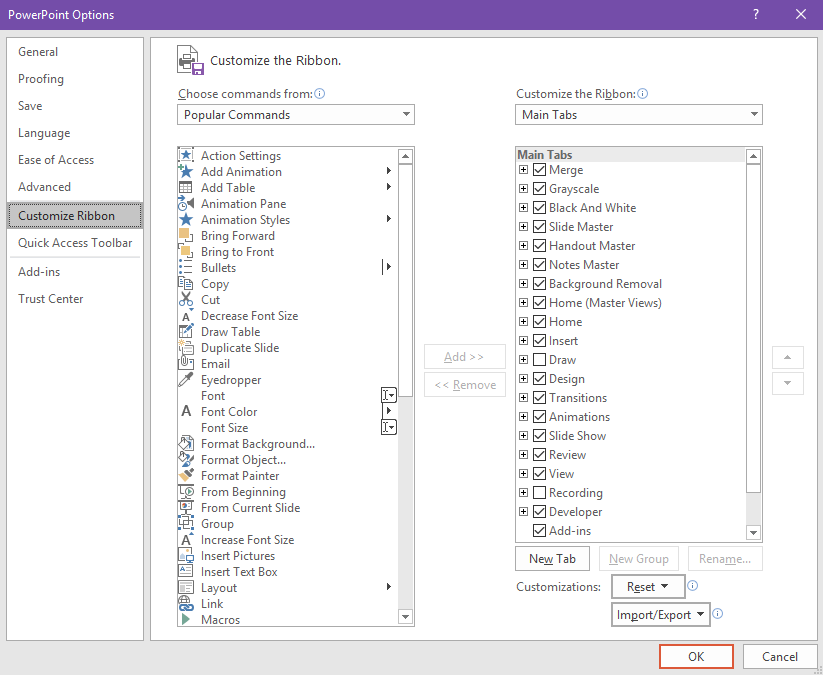
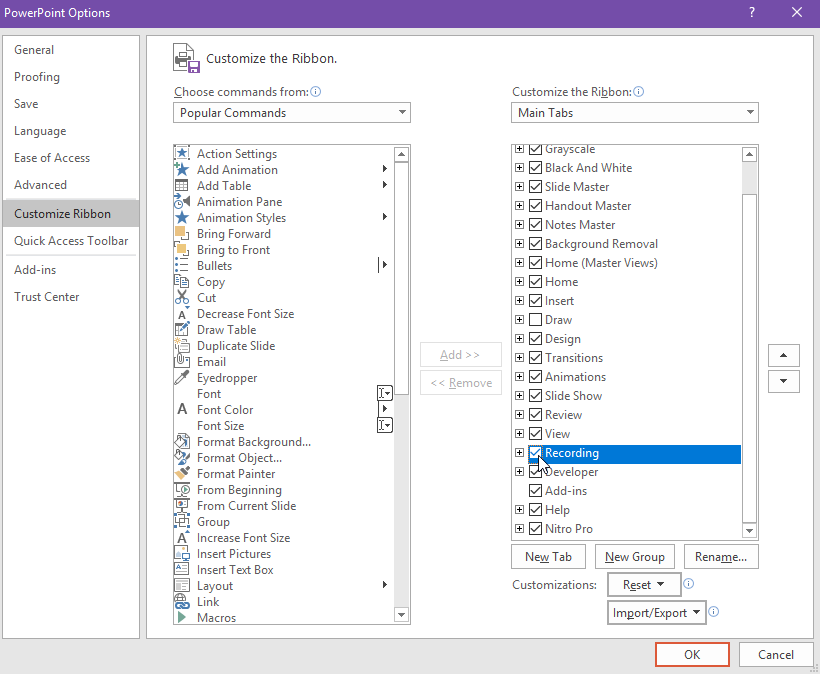
To record your narration, you first have to turn on the Recording function in PowerPoint. Go to the File tab in the Ribbon, click Options -> Customize Ribbon. Here, you will see, in the right-hand box, a list of available Ribbon tabs that you can add to your workspace. Select Recording, and click OK.
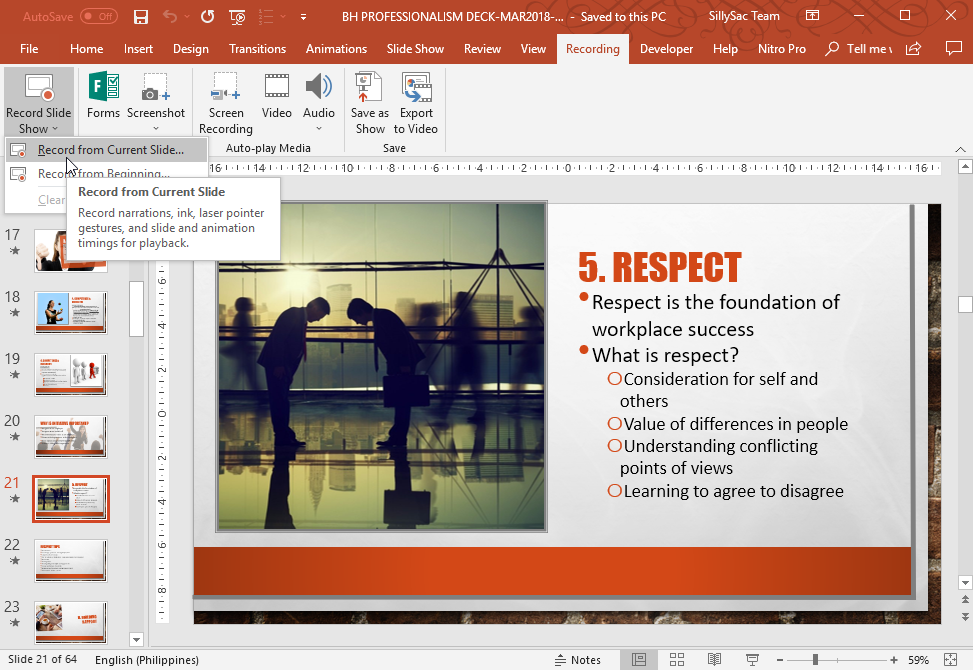
Then, you will see an additional tab in PowerPoint. Once you’re ready to record, just select the Record Slide Show under the Recording tab. You can also find this in the Slide Show tab in the Ribbon.
You have the option to start recording from the current slide you’re on, or to record your narration from the beginning. Be careful not to click on the Clear option, as it clears or deletes your narrations or timings.
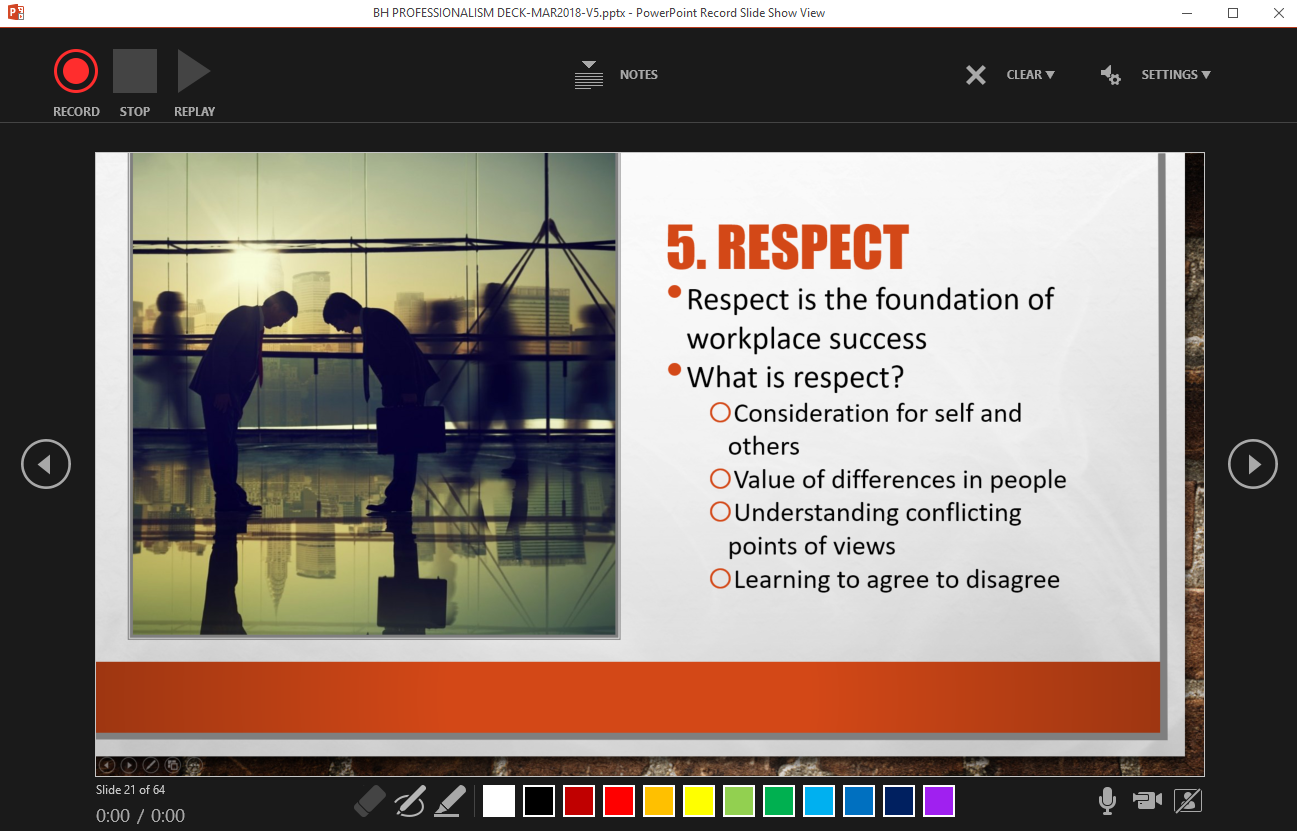
Now, the slideshow will open in the Recording window. This looks similar to Presenter view, but you will see buttons around the blacked out area. There will be buttons on the upper left corner for stopping, pausing, or starting the recording. You can click on the circular red button to start recording, or you can press “R” on your keyboard to start recording. Wait for the three-second countdown to prepare yourself, and the recording shall begin.
Expertly Navigate the Recording Pane
In the Recording pane, the current slide will be shown in the main pane. You can record a video of yourself and this will show at the lower right corner of the main pane. You can click on the arrow keys to navigate forward or back through your slides. Then, you can stop recording by pressing the pause or stop button on the upper left corner of the pane. You may also press the Alt+S keys on your keyboard.
You can choose to record audio or video by choosing the microphone or camera buttons at the lower right corner of the Recording pane. You can also use pen, highlighter or eraser as you go over each slide, and PowerPoint can record that as well. With this narration and recording function, you can interact with your audience and ensure a uniform message each time they watch your presentation.