How to Customize Default Document Settings in Word
Many businesses and organizations can have their own style guides or document formatting standards. This is especially true in the academic setting or even in journalism. There are organizations that practice their own document formatting and styles that deviate from the default document settings of Word. Here is how you can customize default document settings in Word.
There may be instances that you just don’t like the default settings in Word and would like to change it. It can be tedious and time-consuming if you change the settings over and over each time you open a Word document. Often, there could even be the risk of having your documents look different from each other in terms of font faces, heading formats, and paragraph spacing, to name a few.
Whatever your reasons could be, you can definitely change the default document settings in Word. With the tips we are going to show you, you don’t have to keep on changing the default settings each time. You only have to make your modifications once and you’re good to go.
Change the Default Document Settings in Word
By knowing where to look, you can actually create your own custom default settings for your Word documents. You can do this by using a set of tools to create your own default document formatting and settings. Some of the many things you can change are font faces and sizes, paragraph spacing, line spacing, page orientation, and margins.
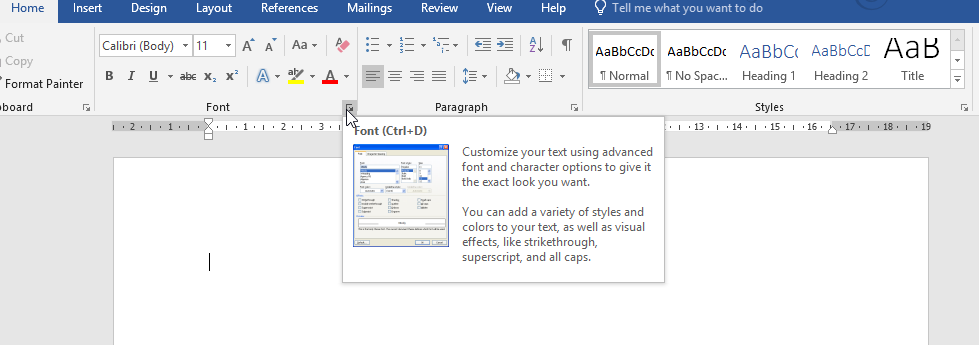
You can know for sure if you can customize the default settings of a certain document formatting element by clicking on the arrows at the bottom right corner of the group or options you see under the ribbon. By clicking on each of the arrows, you populate a dialog box for accessing the basic and advanced settings of each of the formatting groups.
Set Your Customized Choices as Default
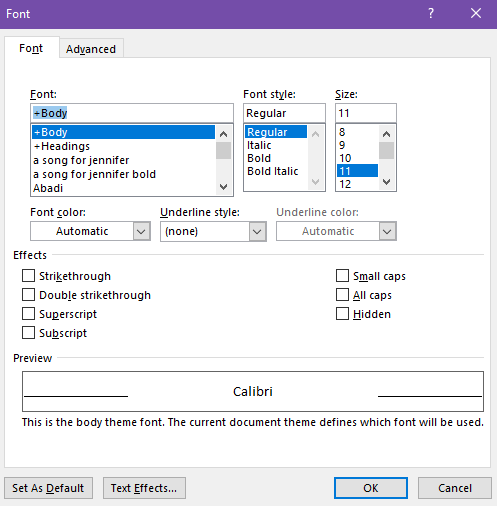
For each of the dialog boxes that populate, you have to look for a button near the bottom of the box. This button should say “Set as Default”. This means you can set your modifications as the default for your documents. Once you see this button, just click it, and Word will assign your current settings as the default.
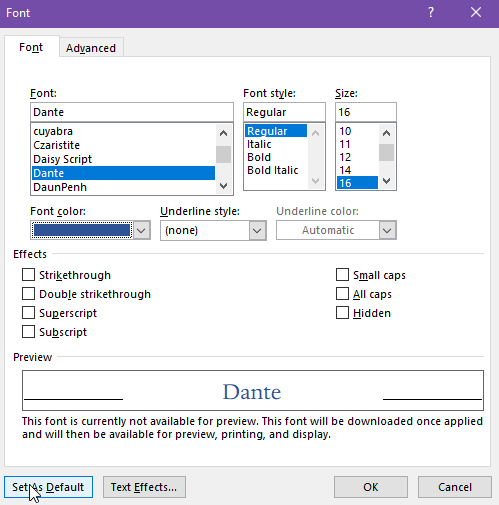
For example, for the font settings, you can set the font face, style, size, color, and effects. Once you’re done customizing this, you can then hit the “Set as Default” button so your settings will be applied to all your documents moving forward.
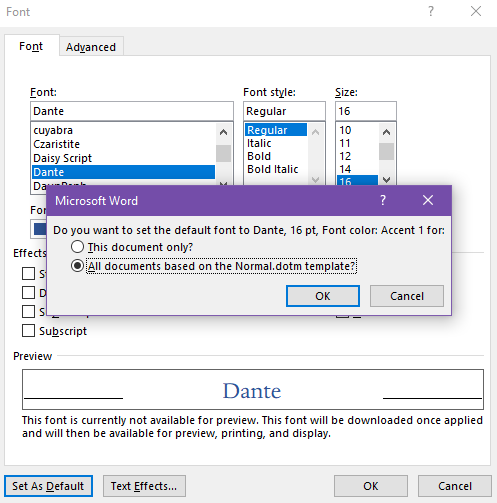
Be sure to set whether you want to set the default for “this document only” or for “all documents based on the Normal template.” The former applies your changes only to the document, while the latter applies your changes to all the document from this point onwards. This means the settings you’ve created will be the new default for all Word documents.
This trick is something that many advanced Word users practice so that their documents look customized, especially when branding is concerned. They set their own font and color schemes to reflect their branding or their style guide.
If you’re a beginner, following this tip should be easy. Just remember that any changes you make will be permanent, and if you want to go back to the original default settings, you have to change each element back manually.
This tip applies to most current Word versions. However, if you experience problems saving your custom default settings, you may contact Microsoft’s support site.