How to Create a PowerPoint Presentation from an Outline in Word
Last updated on April 1st, 2024
There are many reasons for you to want to convert a Word outline into a PowerPoint presentation. For example, in the academic or even in the corporate setting, you may have taken notes about a meeting using Word and you want to present this as a slideshow after filling the slides up with relevant information. You may also be brainstorming with your team and now you want those major points in your session to be fleshed out and turned into an informative and relevant presentation. Let us show you how to create a PowerPoint presentation from an outline in Word.
Other reasons may be because you are more comfortable using Word than PowerPoint. You may also be in a rush and would want your notes to be converted into a slideshow, but you don’t have enough time. Well, worry not. You can actually create presentations out of your outlines without necessarily using a conversion app or downloading a program. All you need is Microsoft Office’s suite of applications and you’re good to go.
Import a Word Outline into PowerPoint
So, how to turn an outline into a PowerPoint presentation? To start this process of creating a PowerPoint presentation from an Outline in Word, you first have to open your Word document. This tip works on all Word versions, as the outline feature has been around for quite a long while.
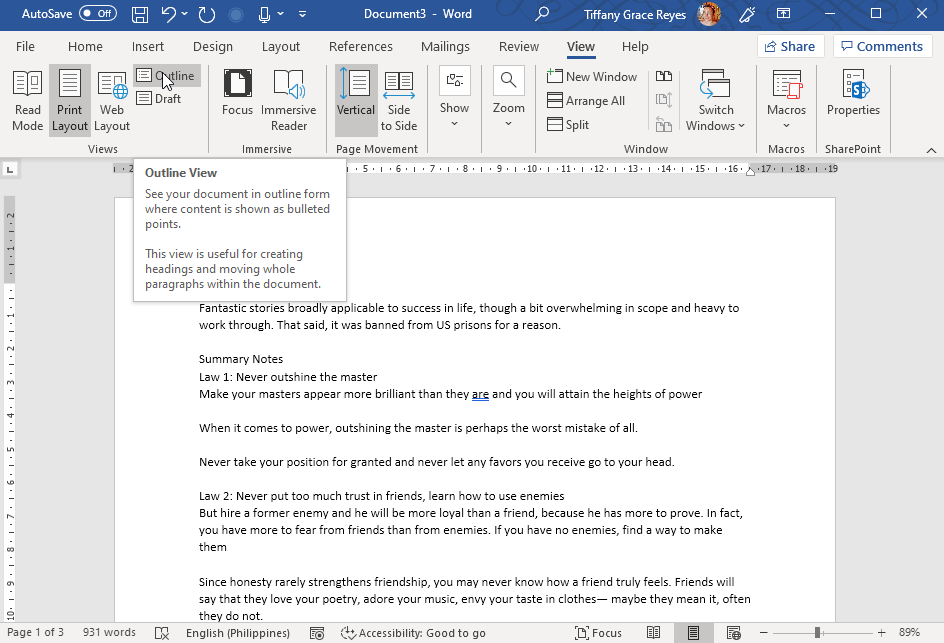
So, in Word, go to the View tab in the Ribbon. Click on Outline. Now, you will see that your long lines of text are organized into a neat list, which is actually your document outline. You will see headers and subheaders listed and in different, distinct bullet points or numbered lists, whichever you used in your document as you typed it up.
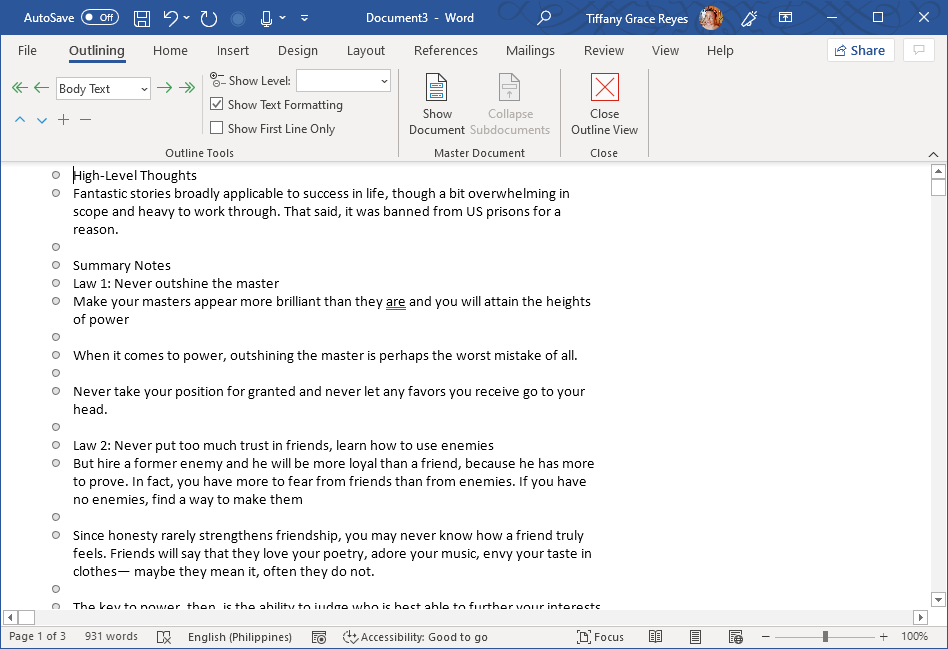
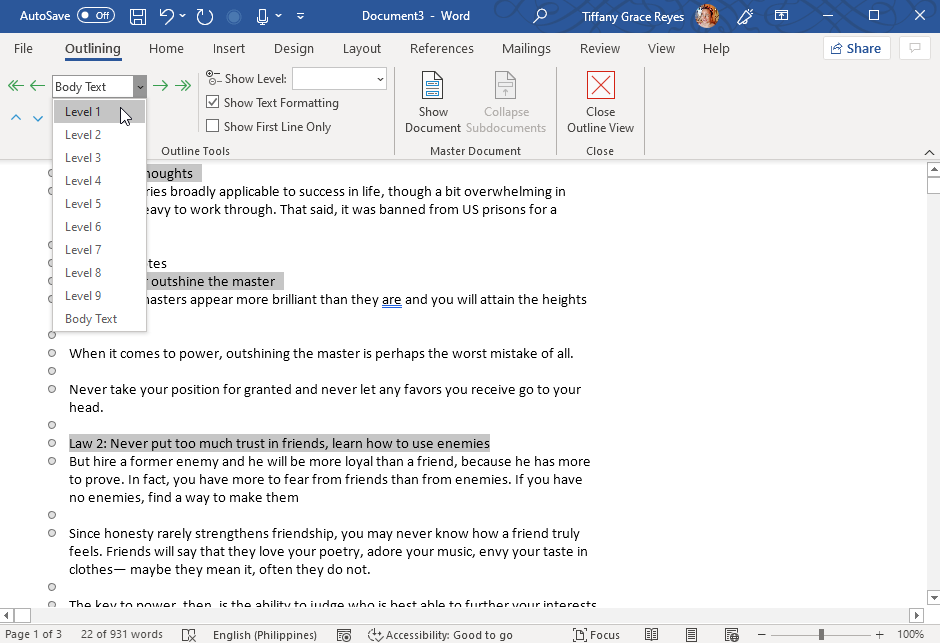
You can go ahead and select the main headers, or the first level of the outline. Just hold down CTRL as you select the particular lines you want as level 1. This ensures that you can select multiple separate lines. Once you’re done, just go to the Outline Tools under the Outlining Tab. Click on Level 1.
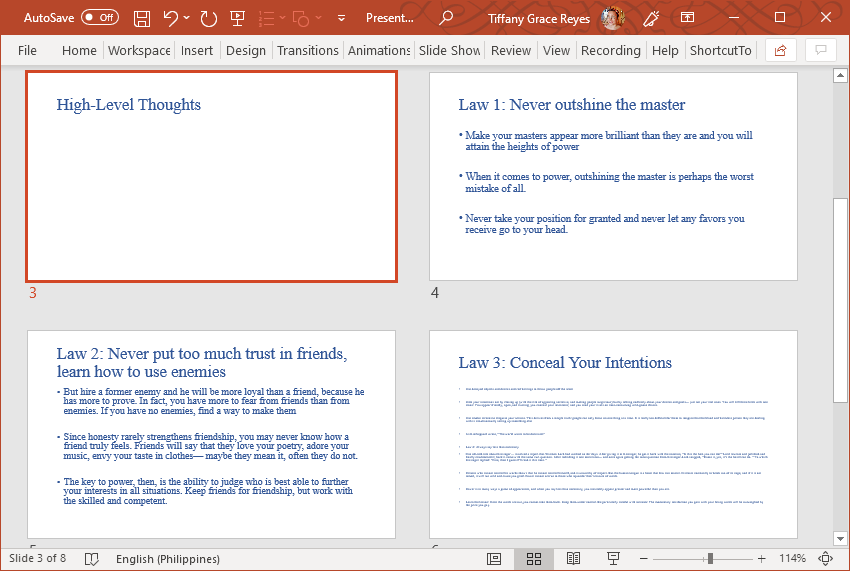
Now, this is what will be your slide titles later on. Then, you can make the rest as Level 2 following the same procedures. These level 2 items will be your bulleted lists corresponding to each slide. Then, save your file.
Make the Outline Show Up in Your PowerPoint Slides
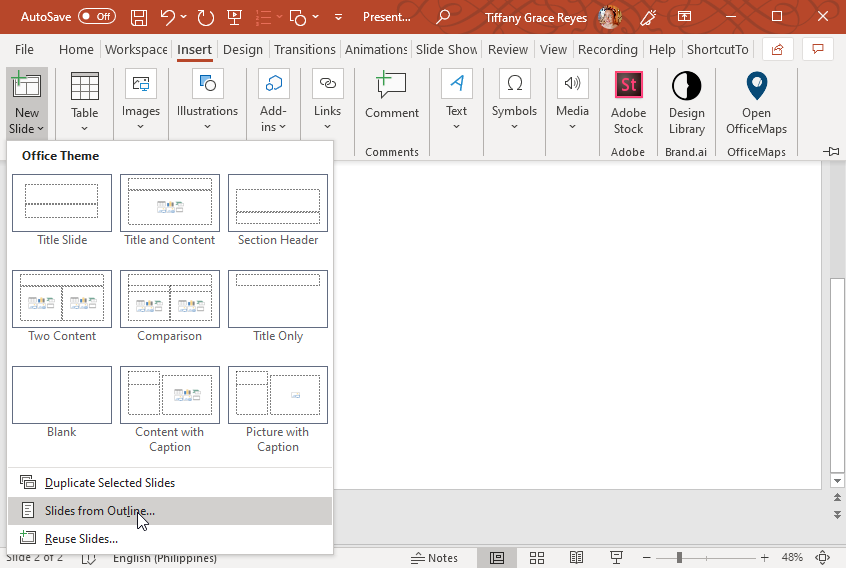
Now, to convert this Outline to PowerPoint, you have to open a blank PowerPoint. Then, select New Slide -> Slides from Outline. The Open dialog box will prompt you to select the Word document wherein you have created your outline for the presentation. Look for this file, select it, and click the Insert button.
This Insert function will automatically insert your Outline in the same order. However, since it’s on PowerPoint, every Level 1 item you have assigned in Word will now be the title of each slide. The level 2 items will also be automatically included under its corresponding headers. You will see that slides and bullet points are instantly created, making your job so much easier. From here, you can just create minor tweaks. You can also add more information into each slide. The main thing is, your blueprint for your presentation is already done, so you have more time focusing on making your slides more attractive and informative. Just remember that if you apply the Normal style to any text in Word, it won’t be included in the Outline function in PowerPoint. Therefore, be sure to assign the right levels to the text you want to include in your slideshow.
You can also create a PowerPoint presentation from an outline in a text file. We have covered this approach in a separate article.